Friday, March 15, 2013

An Unusual Problem 2

(From Jimmy Shoe) Welcome back fellow shoe people of the world. The country which is tenth on our list of hits this week is Brazil. Fantastic! Come on you Brazilians, get shoemaking.

I find myself in Chicago this week doing a trunk show. We have customers to see for fittings and some for new orders. Very exciting, if a little chilly.


The hotel is the Omni on N Michigan where we have a lovely suite. I'm seeing a client at the airport later this morning - we have had a few clients who have flown in from across the US to see us for fittings - but I still have a few appointments open later this afternoon (Saturday) if any of you would like to come by? 


Just a little word to our numerous American readers, I love being here and feel very welcome everywhere except in the airport. Three hours to get through immigration. It's like they just don't want us here! OK, griping over.

Right, back to the unusual foot from last week. We left it without soles and  heels. I was hoping to finish them this week but we have been very busy and I have been slow! But I did get the soles on and built the heels as you will see.

First is the toe spring from the outside edge. Very high. I can get two fingers in there. The usual rule is the tip of your index finger.


Second you can see the toe spring on the inside. Again, there are two fingers in there.There is also a slight twist on the last so that it can accommodate the fact that his foot strikes on the ball, very much on the inside of his foot. This throws the heel off slightly when there is no foot in the shoe.

Next is a view of the sole. You can see how flat it is compared to the big curve on the last. This will give stability when he walks, but on the inside of the shoe, the insole still has the curve so that he is comfortable.

Last shot is of the sole in relation to the heel. Both flat and fit for walking on.

The only thing left to do is finish the shoes, make the trees and give them to the customer. As with all bespoke shoes, the solutions we come up with for an individual problem are not infallible, so when we give these shoes to the customer, we are fully ready to accept that what we have done may not be the best thing and that we may have to adjust the shoes in some way. With this pair, it would probably mean altering the lasts which would mean remaking the shoes form scratch (we don't want to do that). Usually though, if we need to adjust a finished pair of shoes, there are plenty of tricks and tweaks you can do on the finished shoes because oftentimes, the change that is needed is very small and subtle. It is amazing how a tiny change can alter how a shoe fits.And that is it for this week. We will,let you know how the customer gets on with the shoes in a few weeks.Until next week, wish me luck in Chicago and happy shoemaking!

Friday, March 8, 2013

An Unusual Problem

Good morning, afternoon, evening, whichever time zone you find yourself in. We are feeling the first warmth of Spring after a long, cold Winter which is delightful. The days are getting longer and it is no longer dark when I go home. And as the year goes on, the number of orders goes up. Why is it that people don't like to order shoes in the Winter?

Anyway, take a look at this last. What do you see? Comments? Questions? What kind of shoes will be made on them?

Take a look at the toe spring. Pretty high. You would expect a 2" heel with these.


The rule of thumb we use on toe spring is that you tip the the last up at the toe with your hand and then you put the tip of your index finger under the toe. At that height, look at the heel area and measure from the outside heel point to the ground. The standard we use is 1 and 1/8". If you do this on these, it is over 2".

The tip on this picture is not quite enough, so the heel height shown is too low. Plus it is the inside not the outside. Bad planning on my part, sorry.


Another thing to notice is the extreme curvature on the underside of the last.


Now, why all this, you may be asking yourself?

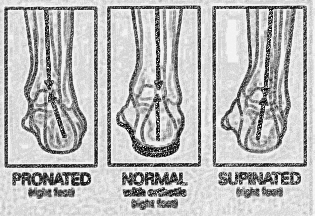
This customer has unusual feet. When he is standing at rest, his toes stick up about 1" from the floor and he has a large curve on the soles of his feet. As a result (possibly, possibly not), his gait is very bouncy and his feet have a pronounced rock from impact to lift off.

So, after discussion with our last maker, we came to the last pictured above. The rationale is this - we left the huge toe spring so that his toes are not forced down and painful; we left a big curve to fit the actual contours of his feet. This means that the last acts a bit like a rocker sole and will allow his natural gait to continue, rather than forcing him into shoes which contort his feet.

One aspect of the making with this last is the transition of the curve of the sole of the last to the sole which will hit the floor - this has to be flat. So we have to start this transition with the insole. We used a very thick one which, when we prepared the holdfast/feather, we skived the domed middle flat.


The upper side remains dipped in the middle for his feet to sit in comfortably.


But the underside has been skived flat.


The next stage was after the shoes were welted. We welted as normal and put in the shank and cork filler - we used cork here because it is much easier to shape than felt.

The trick here is again to flatten out the middle of the insole by rasping the cork well. Most of the cork in the middle was rasped completely away.


The underside profile of the shoes at this stage is much like a regular shoe because you can't really skive the sole because you want to keep the thickness unchanged so that they last longer.


This is as far as I have got with these shoes, so you can look forward to seeing the finished product next week.

Until then, happy shoemaking

Friday, March 1, 2013

The 2013 Annual Independent Shoemakers' Conference

Welcome back once more, dear readers. We hope you are well and looking forward to some news from the world of bespoke shoes.

Saturday saw a very early start for both of us. I met Deborah at some far flung Tube station in West London and we set off along the M40 for Alcester in Warwickshire and the 15th(?) Annual Independent Shoemakers' Conference.

The information for this organisation is found at www.shoemakers.org - a loose collection of shoemakers from around the UK (and a few from abroad).

The conference is organised each year by a different member and this year it was the turn of Bill Bird Shoes. They did a fantastic job, so a great big thank you to them. It was very interesting and a great opportunity to meet other shoemakers, pattern makers and closers.

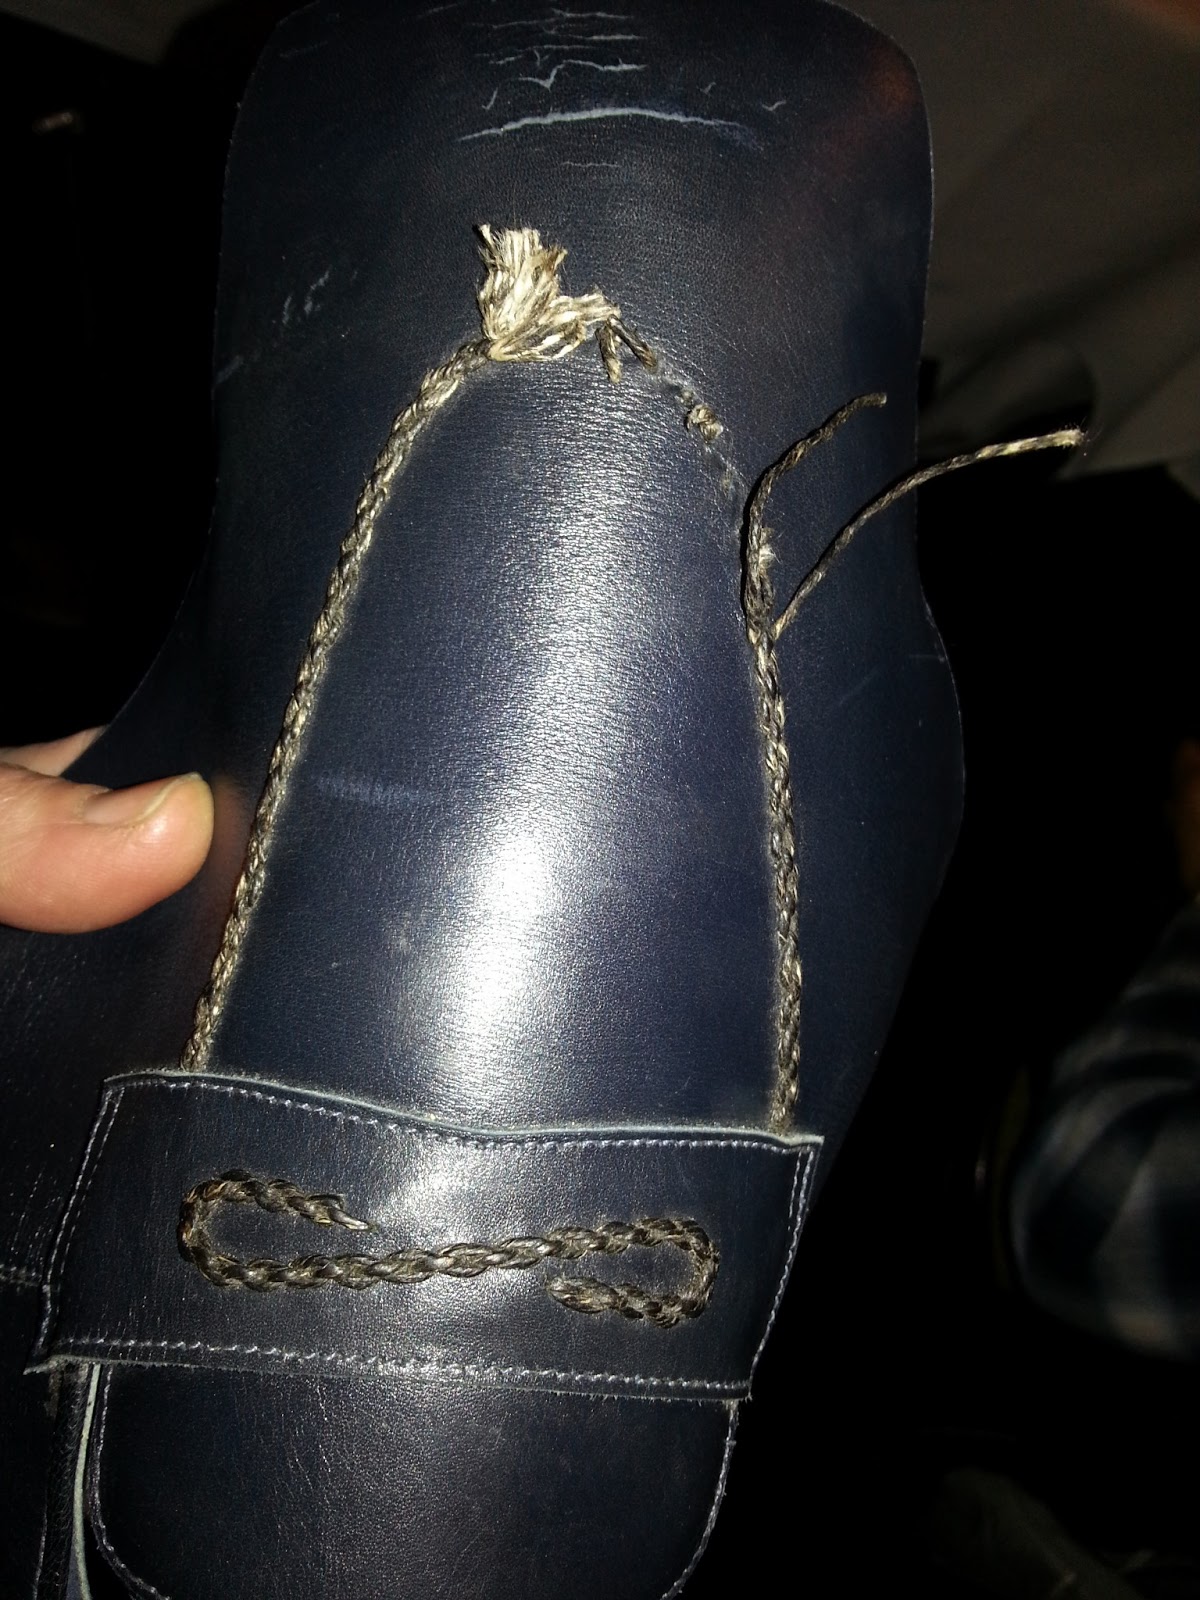
It is a combination of lectures and networking, so we started the day with a demonstration of hand stitching techniques for uppers by Dominic Casey of Cleverleys - raised lakes, split stitched seams(?), plait stitch and a bit of thread making - very cool indeed.

Plait Stitch Being Done

The Plait Stitch Which Uses Two Stitching Threads And Two Thicker Plaiting Threads


Dominic Casey In Action


Next up was a demonstration of hand welting techniques by John Cornforth of Yorkshire. We particularly liked his traditional shoemakers bench and lasting post.


Next came lunch where we chatted to a chiropodist from the Isle of Wight who had an affinity with Crocs - obviously not a passion we share.

Mock Croc Crocs Anyone?


We then moved to an area which was a bit of a revelation to us both - how to make shoes for women with problem feet and make them look fabulous. That classic mismatch between how a woman sees her shoes in her mind's eye and the actual shape that her lumpy, painful feet require the shoes to be.
This involves detachable accessories like straps, buckles, clips, bows and flowers. Very clever and creative in fact. The talk was given by Carina Eneroth of Swedish shoemakers Framat, shoemakers to the Swedish Royal Family.


We even had a go at making a bow with varying degrees of success - I think I will stick to the day job.


The penultimate talk of the day was from Bill Bird himself who talked us through the ins and outs of hand carving wooden heels - very interesting and challenging.


And finally, came a technical exploration of the properties of leather, from the raw materials to the finished product. This was by the head of Leather Studies at Northampton University. She went through the structure of leather from different animals and the way they are tanned and coloured. It was very interesting and explained why we use certain leathers for certain jobs - for example, did you know that the reason pig skin is so tear resistant is that the hair follicles and sweat glands go all the way through the thickness of the skin? Whereas in calf, goat and sheep, they are only in the surface layer. Fascinating stuff!

We also had time to chat and catch up with old friends and colleagues and we generally had a great day.

For those of you who live in the UK, this is a thoroughly recommended day out. You will meet other shoemakers who might be able to help and we are a very friendly bunch. So make sure you come next year.

Until next week, happy shoemaking!

Friday, February 22, 2013

The business of orthotics


I don't know if other shoemaker have noticed this, but the use of orthotics seems to be on the increase?

In the last six months I would say that 90% of customers were wearing orthotics. So this week's blog isn't so much about answers but more, questions as to "am I right?", and ," if so, why?". Is it that people have more foot problems; are more aware of them; or that orthotics help manage more complex perambulation problems?

Wth our customers, we first discuss why they wear orthotics and whether we can/and they want us to incorporate the adjustments into their lasts / bespoke shoes.

This could be anything from creating a 'pocket' in the underside of the last for an enlarged big toe joint to  creating a light, up-in-waist to support a flat arch without prohibiting its ability to flex.


If they are in a lot of pain or the situation is complex, we ask the client if we can talk to their podiatrist to seek their expertise and work with them to achieve the best result for the client.

When we measure a client who wears orthotics, for bespoke shoes we
- take their foot measures with and without the orthotics underneath the sole
- we take a foam impression of each foot
- we draw around the outline of the orthotics top and bottom; note their dimensions and depth at certain points .

This gives our lastmakers enough information to create a last that fits and a record of the contours on the underside of the foot to create a suitable insole-up-in-waist if needed.

In many cases, finding shoes that have enough back height for the orthotic is a big problem and that is where bespoke can provide an attractive solution. By creating a last that incorporates room for the orthotic we can create a design that disguises the increased back height.

We hope to learn more about orthotics this weekend - we're meeting shoemaking friends old and new at the annual Independent Shoemaker Conference - as this year's host is Mr Bill Bird whose expertise in perambulation is unsurpassed!

Until next week, happy shoemaking.


Friday, February 15, 2013

Grooving The Channel

A very warm welcome to one and all. Another week goes by and we have been busy! As always with bespoke, we never have a steady flow of work where you take regular orders and they flow through production in an even cycle. It seems to work like London buses - they all come at once. So currently, we are both weighted down with a long line of shoes to make (I'm not complaining). We have made 5 pairs in the last two weeks. This is is great on the one hand, because we both love shoemaking. The reverse is that all the other things we have to do to run the business are delayed. Believe me, running your own business is more than a full time job.

Anyway, on to shoemaking. For those of you who missed it last week, check out this video - it's pretty cool.

And check out these shoes which we have just uploaded to the website. And these. It is a patina service we offer to clients done by our friend Paulus Bolten in Paris - pretty luxurious and beautiful. It's great to be able to offer these extra services to our customers, it adds to the feeling of uniqueness which is part of the bespoke experience.

We recently contacted another patina artist in Brussels (Place du Chatelain) whose work we have admired for a while - Landry Lacour. We will have to send him a pair of shoes to paint. Really love this kind of thing, ways to enhance a pair of shoes.

And so to shoemaking. When you are stitching a sole, one of the things you have to be aware of is the little ridge that the stitches can make under the channel. This looks bad and also makes finishing the sole a bit tricky. This is particularly true on a thin sole because you naturally cut the channel more shallow which makes the stitches sit nearer the surface.

Normally we make a groove with a grooving tool which consists of a broken awl which has been sharpened to a point which we run inside the channel (see this blog post for images).
This method works very well, but sometimes, if you are making a very thin sole like 3/16" or less, it can improve the look of the final sole to cut your groove like this.


3/16" Sole With Channel Cut

You can see the channel is shallow.


Making sure the tip of your knife is both pointed and sharp, score a line inside the channel with the very tip of it. You are not really trying to cut the leather, more just scoring the surface. You need to be very careful and confident of your knife skills. Make sure the line is in the right place. Check this by looking at your welt and estimating where the awl will come through.


This is how it should look.


Then get a small screwdriver and run it in the scored cut. This has a major effect and makes a wider and deeper groove for the stitches to sit in.


Hard to see here, but the stitches sit flush with the surface of the leather and don't stick up.


This stage is very important. Take your bone and rub the stitches really hard and fast to squash them. You should work up a sweat doing this.


Then you can glue down the channel with contact adhesive, hammer the edges, and smooth the whole sole with a smoother (a sanded chair leg or rolling pin will do fine).


You can see here that the sole is smooth and the stitches are not visible.


On a thicker sole, you have much more leather to work with, so you do not need to use this method. Having said that, it does fit in with my personal idea that it is better to learn to work with as few tools as possible because finding specialist shoemaking tools is getting harder and harder. As you can see from the following page from the 1981 Barnsley catalogue, there used to be a tool for cutting the channel; opening the channel; and three different tools for grooving the channel. All lovely and very functional and probably easier to use than just the knife, but you can do all these jobs with the knife, a screwdriver and a bone - simple!


Hope you enjoyed the post. and until next week, happy shoemaking.

PS There are 2 places left on our New York intensive shoemaking course in May if you fancy making a pair of shoes with us - it's fun!

And don't forget our new pattern making course here in London starting on 29th July for a week. All the basics for making shoe patterns for one-off shoemaking projects.

And finally, the August intensive shoemaking course here in London is full. Next one is January!

Friday, February 8, 2013

Less is more


We hope that the lubricating revelations of last week left you with a smile on your face...particularly the illustrative photo!

This week's post continues with a light note...

First the heady subject of inspiration and design...James and I are doing more and more design work for both bespoke and design consultancy clients ...and we really enjoy the challenge of it. Like Mies van der Rohe, we believe in "less is more" and that "simplicity is the ultimate sophistication".

Working together as a team on each design we edit one another's ideas paring back designs and paying close attention to detail. That really is our signature...tiny changes to traditional styles....something that is hard to achieve.

"It takes a lot of hard work to make something simple, to truly understand the underlying challenges and come up with elegant solutions". Steve Jobs

So whilst we try to bring new material combinations, innovations, colour trends and heel heights / sole depths / toe shapes to bear, to give our men's shoe designs a fresh look, we bring to bear our expertise as West End shoemakers.

Like most designers we are reinterpreting classic styles...
  • Louboutin and YSL's red soles echo the red heels worn by aristocrats during the reign of Louis XIV (I wonder if any of our customers would like to try red heels as a status symbol?)
  • Lightweight slip-ons worn outdoors today are inspired by the gentleman's monogram house slipper 
...And boots are inspired by the galoshes and spats of the early 1900s...

CD button boots
The CD Special
Paul Smith 2013
(Fancy a collaboration Sir Paul?)

Talking of collaborations, what seems a lifetime ago James and I did a bit of 'acting'.

We thought the results would never make it on-screen but one of the actors from the commercial dropped by this week and low and behold here we are on You Tube (I'm sure our contract said  internal use only!!!!!). Anyway, take a look...we'll let you know if Hollywood comes knocking!


And finally, to finish on an even lighter note, below is the best business card I've ever seen...great product; great company; great confidence and humour! (The owners details have been concealed for security).


It's actually been a very very busy week of shoe making, so look out for the results of our hours at the bench in next week's post. Until then happy shoemaking!


Friday, February 1, 2013

Shoemakers' Grease

Welcome back, dear shoe people of the world. Another week in the busy life of two shoemakers.

Part of the reason we do the blog is to pass on our knowledge which we acquired over a number of years from a master shoemaker. Now, obviously, most of what he taught us was the mechanics of shoemaking - lasting, welting, heel building, etc. But every now and then he would share the more arcane secrets of the shoemakers' lore. And today, it is your good fortune to have access to a little of this knowledge.

This information will apply to those of you who use bristles when you stitch, either boars bristles (the purists among you) or nylon bristles. However, it could apply to those of you who use needles.

The greatest problem with either way of stitching is attaching the bristle/needle to the thread and keeping it on. As you pull each stitch, there is a great pressure exerted. So you need a good way of attaching it, but you also need to make the passage of the thread through the holes as easy as possible, and this is where the great secret I am about to share with you comes into play - shoemakers' grease.

Some of the products we use are easy to find and others require a bit of searching for. Luckily for you, shoemakers' grease is the easiest product to find. You produce it every day.

Here is how you use it. After attaching your bristles or needles in the normal way, take your bristles or needles and press them into the side of your nose where it meets your cheeks. Give them a good coating. There is a second source of the grease which is just above the eyebrows. Both work very well.


If you are going to use the shoemakers' grease, you need to bear in mind a couple of things. One, don't use your thumb or index finger to put it on because this will make the bristle slippery and difficult to grip. Two, only put the grease on the back end of the bristle, for the same reason - you don't want to get the grease on the bristles/needles themselves near to where you grip them

And there you have it. This may seem a bit gross, but it works and it's free!

Let us know how you get on with it

Until next week, happy shoemaking!