Welcome back, dear shoe people. We hope you have had a wonderful week
We have two courses starting on Monday. Our first October Intensive Shoemaking Course and our Modular Shoemaking Course returns after a long summer break. So one of us, has eleven hours of teaching on Monday. A seemingly unfair division of labour, but one of us has tickets for Charlie and the Chocolate Factory. Priorities!
Anyway, back to shoemaking.
So, you buy some old tools on eBay. You really need an edge iron, but they look quite old and rusty.
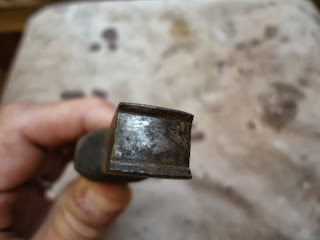
Can this lovely old edge iron ever be used again?
Never fear, you can restore it to its former glory. There is a limit to what you can do, but this one is well worth repairing.
You will need some fine metal files. Fine! The triangular ones with flat surfaces are good.
Various aluminium oxide papers, 120, 240, 400 and 1600.
A junior hacksaw blade
First off, you will need to flatten it with a hammer on a metal surface. We use a lap iron. Use the edge of it though because the hacksaw blade can leave little marks on the iron. The reason you do this is because the blade has serrations like a normal saw but the edge is not flat, it waves from side to side. Hard to see from previous pic but if you look at one in the flesh it will be obvious. The effect of this is to make a wide cut mark which is no good for what we want to do with it. we need a narrow cut mark, hence the flattening process.
Start by filing away the worst of the black pitting. This is due to oxidation and the steel oxidises unevenly, leaving a pitted surface. The pits are not deep but you need to file the surface back to get rid of the black bits.
If you have a vice that is perfect, but you can do it in your hands. It is more difficult but possible.
It should look something like this.
Now you need to polish the surface of the iron to make it smooth enough to finish the edges of your soles.
Wrap the coarsest paper around the file and polish. Use progressively finer grades until you get a very smooth, shiny surface.
Now for the grooves at the sides of the iron. These are important. This is where the junior hacksaw blade comes in. If you hadn't flattened the blade, the groove it would cut would be too wide and you would ruin the iron. But having flattened it, you get a nice, narrow groove. It needs to be about 0.8mm deep. Do both grooves, but I wouldn't recommend doing the second of the double grooves on one side. The hacksaw can slip and scratch the iron.
And this is how it should look. I wouldn't worry too much about the black at the sides, it won't affect the finish you get on the edges.
And that's all folks. Until next week, happy shoemaking!


