Friday, May 28, 2010

Back In The Saddle

So, the course is over and here I am , back home and back to work. It's amazing how much it piles up after ten days away. It is also amazing how soft your hands get! In fact I saw my master, Paul Wilson, in New York, and he was telling me how he has had a three year break from shoemaking. He is planning to start up again and is worried about the state of his hands and whether he will remember how to do it. I reckon it is like riding a bike though. It will all come flooding back and he will be up to speed in no time. It's all good.

All the students finished their shoes on the Saturday and were very happy (see the video in previous post). Here are some shots of the finished shoes. The overall standard of work was very high and I was very pleased with everyone.


Wesley, clearly delighted with his finished shoes.


I particularly liked the natural stitching on the welts.

There was talk of how they will continue to make shoes on their own. All of them want to do this. Of course we are available to help with individual problems, but there was a larger issue - the difficulty of getting the uppers and rough stuff (the insole, sole, heel lifts etc). One of the problems is that you need to buy a whole skin of each of the different pieces and it is difficult to find, especially in the States. And buying all these skins is expensive because they are large. Some of them are enough for ten pairs of soles, for example.
Unless you also want to try closing uppers (many students do), the other difficulty is finding a closer to make the uppers for you.
We talked about carreducker creating and selling 'making packs' which contain all the materials and a pair of uppers to make one pair. This could be done. What do you think out there? Is it a good idea?
They would probably need to contain some basic tools too.
A lot to think about, so watch this space.
One thing is for sure, it would be a shame to have done the course and then be frustrated in one's attempts to make further pairs.


We have quite a few bespoke orders at the same point, ready for a try on. There is one particular pair that I like very much. It's a ladies' brogue based on our original ladies' brogue we launched last year. The client's name is Frost, so the Other One did some brogue patterns based on ice crystals, with a purple underlay, and I think it looks really lovely.

I have blocked the insole, which is now dry. The uppers are ready, so all that is left to do is last them over; brace them onto the insole; and glue on a temporary sole.
At this point, the client can have a fitting and from here, we can make any adjustments to the lasts before making the shoes.


I will keep you up to date on the progress of these bespoke shoes.

So, until next week, happy shoemaking.

Wednesday, May 26, 2010

Carreducker Shoemaking School in New York

A taster of things to come. One of our hosts Tom took some video footage of the course and this was the last day. Some of the students try on their finished shoes and are so happy, they leap for joy. Good times!

Sunday, May 23, 2010

The Other One running to catch up!

Apologies that this posting is not sequential, but I have been busy catching up with client work in the studio having just made it past the ash cloud by the skin of my teeth!

Mr D. is still out enjoying juicy bites of the Big Apple but what a great time we had...and hopefully our students did too. I really loved teaching the group, but felt rather guilty because I really had to push hard during the first week to keep everyone on track for when Mr D. took over. But it seems to have all paid off and I received a little mini-film this afternoon of the class dancing about in their finished shoes! Whew, well done guys, you really worked hard and I loved seeing the results!

But to re-cap and fill in some of the gaps here are some pics from the outset of my time in class. As you can see we are in the light and airy space of former student and now NY shoemaker Jesse Moore. A big shout out and thank you to Tom and Jesse for looking after the limeys so wonderfully...a jog in Prospect Park, supper at Gotham and a NY pilates class are amongst my highlights!!!

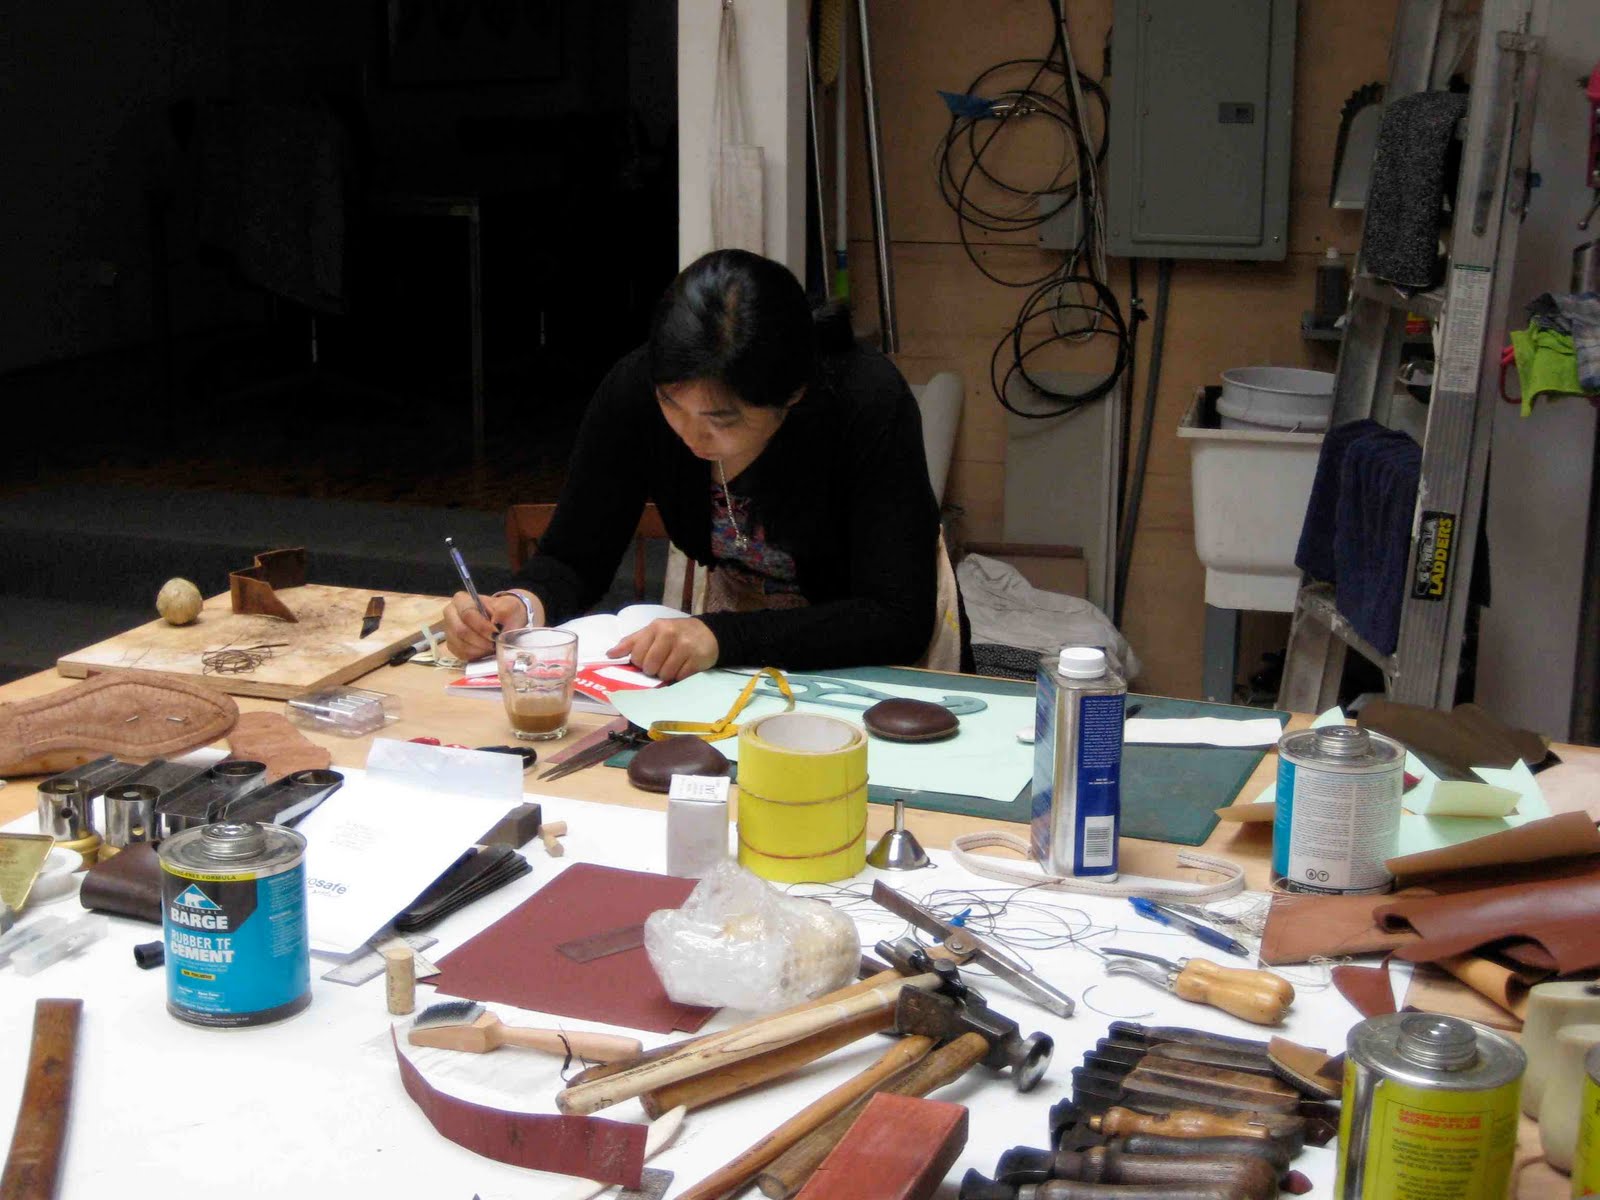
Some of the tools of the trade set out to show the students what to expect and what they will be working with. Front and centre are the most important - the shoemakers' knives!

Hesper proving you don't need to be big and muscly to be a shoemaker.

The NYPD's loss was our gain as Tom determinedly hand crafted his shoes. The beauty of the shoemaking classes is how supportive everyone is.
Kris, Tom and Ryan urged each other on through lasting lumps, welting wobbles and bristle breakdowns and Colin kept the mood light with some choice one-liners.

We always knew the two-week, six days a week intensive was going to be tough and sometimes the guys just needed a little down time...even if it was a 20 minute cat nap mid-afternoon!

Thanks for a great class everyone...let us know how you get on with your next pair (and don't forget we are only an email or Skype call away if you get stuck!)


Thursday, May 20, 2010

New York Shoemaking Course

So, here I am, the start of day four for me, day ten for the students. We are heel building and on course to finish on Saturday.

The Other One led them very well to the half way point, on schedule, with the most challenging tasks behind them. That is one of the quirks of the process, that the hardest jobs, sharpening the knife, skiving leather, and welting, all happen in the first few days. I suppose this is not a bad thing, at least it sets the tone for the rest of the time. This is course is intensive! But it is also thoroughly enjoyable and very satisfying, especially now their shoes are looking like proper shoes.

This year the students are a thoroughly mixed bunch, from a bio-mechanical engineer to an NYPD detective. Hailing from all corners of North America, they have one thing in common however, a love of handmade bespoke shoes. They have all applied themselves very well to the tasks and I applaud all of them. Nice job guys!

The great thing about this course is that the teacher:student ratio is so good that everyone can work at their own pace and still get lots of 1:1 tuition. As long as they finish on Saturday, we don't mind. Each stage presents different challenges and some people find certain things harder or easier than others. One thing is for sure though, punching nails is universally difficult! I have no idea why.

Here are some pictures of the course. As you can see we have a large, airy studio to work in, thanks to our lovely host, New York's premier bespoke shoemaker, Jesse Moore. She has been very welcoming and helpful, so thank you Jesse.


Wesley building his heel. He has attached the split lift and is trimming it to size.


Tom stitching his sole on.


Hesper taking notes. This is absolutely essential to allow you to make shoes in the future. We provide comprehensive notes, but students must add to them.


Colin attaching a bristle to his thread. Originally boers' bristles, we now use nylon ones as they are easier to find and stronger.


Ryan stitching his sole.


A shoe in progress. Split lift and two heel lifts on. At this point, the shoe really begins to look like a proper shoe.

Friday, May 14, 2010

You Only Need To Ask

Here is a picture of the course. Everyone looks happy and busy. Looking forward to meeting them.

Mad Dash

Well, I am off to New York tomorrow to teach week two of our course. The Other One is there now, just about to start day five. She says things are going well and that the students are progressing. You never know, we might even get some pictures! A request has been sent.

I went to a party at Wolf and Badger last night where our ready to wear shoes are selling well. It was good to see lots of new designers and meet a few of them. I was particularly pleased to meet Jay Kos, who has a menswear shop on 5th Avenue in New York. His clothes are really wonderful. Classic pieces of the gent's wardrobe, beautifully tailored, but with a very contemporary feel, whether it be the colour, the material or the detailing. Or all three. We agreed to meet in New York, so I am looking forward to seeing his store (great address!)

I have been tying up loose ends and finishing things off this week. Yesterday I had two clients in to try on shoes. Fittings are really important in the bespoke shoe process. It is one of the things that marks them out from factory made shoes. They have to fit you correctly, so we spend as much time as necessary.
I say to clients that there will always be one fitting, usually two and sometimes three. This covers about ninety percent of cases. Some, however take more visits, but that is all part of the service. It is what you are paying for.

After the last and the uppers have been made, we get the shoes to a state where they can be tried on. This involves lasting the upper with toe puff, stiffener and side linings onto an unprepared insole, which has been blocked, dried and trimmed. Notice that you do not trim the upper leather, just leave it full and nail towards the middle of the insole so that if you need to adjust the upper, you do not have holes in the it.


The upper is then brace stitched onto the insole using either welting or stitching threads with bristles attached. Some people glue the upper down, but bracing is stronger. When brace stitching, put your welting awl through the upper and then into and out of the insole. You can then pass the bristle through the hole and carry on right round the shoe.


You then remove the last and, using rubber solution, you glue on a temporary sole made from a flexible thin soling leather. The last thing to do is to nail on a temporary heel which you can make or buy. The shoe is now ready for a fitting.


When the client tries on the shoe, you discuss the fit and mark any changes you need to make with a silver pen on the upper. I also make written notes on each foot. This is a very important stage which I have simplified. But if you both communicate well, you should be able to manage it. This process involves a lot of feeling the shoe with the foot inside it. It is quite an intuitive process, which improves with experience.


If you need to make the shoe bigger, you glue pieces of leather to the last. If you need to make it smaller, you rasp the last and remove wood from it. If you look at the picture, this client has needed both procedures. You will find that some feet are just harder to fit than others. But you can always get there in the end.

Friday, May 7, 2010

Lizard Shoes!

We went to a private view last night at the Hepsibah Gallery in Hammersmith, where Eloise Grey had a show. It was a showcase for her new clothing lines and for our collaborative Winkers in her tweeds (as featured in How To Spend It online). A very successful evening and the Winkers looked really fantastic with her clothes. And we had an enquiry from Holland earlier in the week about them, so I think they have legs - excellent!

We delivered a pair of rather unique shoes this week. A version of our special lizard oxford. But, as you can see, they are in a mulberry lizard with matching snake trim. I think they are amazing!


The Other One is on a plane to New York as I write, so, barring another ash disaster, she should be starting the course on Monday, very exciting. So I am left holding the fort - the responsibility!

Now, back to that repair. I left it with the heel off;the sole cut off; the split lift pinned back; and the sole left to prepare.

Soak the sole and let it dry to a 'mellow' state. Prepare it in the normal way; rubber solution it; on and stitch it on. At the heel where the old sole is left, you must judge where the old and new will meet and bevel the new sole to fit in the shape of the old one. Use neoprene cement to glue the 2 bevelled edges together.


First you must put the split lift back in place. Use paste and nails as you would on a normal heel.


You now have to put the old heel lifts back on. This saves you time and simplifies the process. With paste and nails, put them back on in the correct order. You must make sure that they are in the correct position as you do not have much spare material to play with.


Now you have your heel rebuilt, you put on a new top piece. I use neoprene cement and nails for this because it is so strong. Some say this leaves a little line of glue on the heel edge, but I don't find this to be a problem.


Finish the heel and sole edges as normal; polish the upper thoroughly; and you have a shoe that is as good as new. It is an extensive repair, but the results are worth it.