Thursday, January 27, 2011

How Can You Tell It's A Bespoke Shoe?

Another week, another career, fellow shoemakers

In addition to my credentials as a master shoemaker, I have embarked on a second career in modelling. Any of you who may walk down Vigo St, will see a (very) large photo of yours truly in the window of Gieves and Hawkes. Fame at last you might say.

Unfortunately, I do not foresee as much success in this new occupation. The Other One's reaction was "When is it due?". Harsh in my opinion, but I can see her point. I blame it on an unfortunate apron malfunction. And there is nothing I can do about my face, so I think I will stick to making finely crafted custom made shoes.


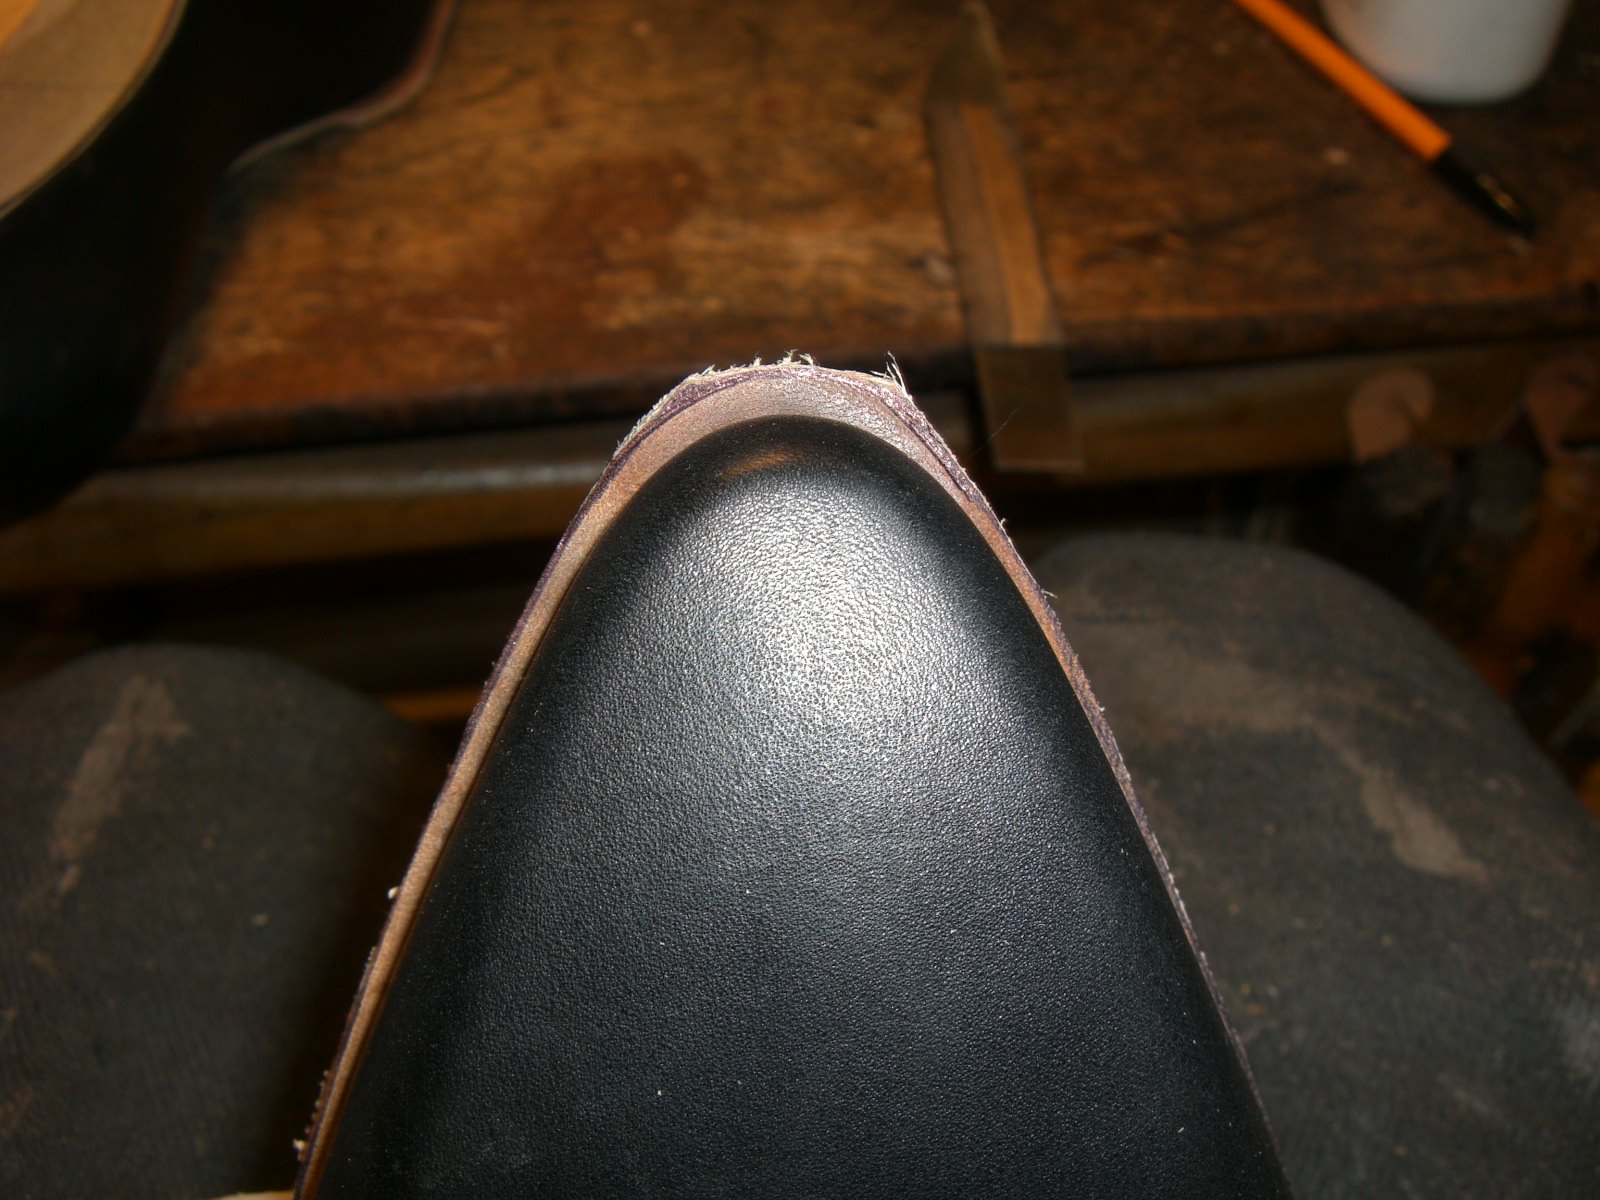
People ask me what makes a bespoke shoe stand out from a factory shoe. How can you tell if someone is wearing bespoke shoes? Well, there are some give away signs. The principle one in my mind, is the mythical bevelled waist - that part of the sole leading up to the heel where the shoe is pulled in and given an elegant curve.

The bevelled waist is folded up against the upper using a combination of skilled skiving with a knife; preparation work; and a special iron. The result is unmistakable and cannot be reproduced well by a machine.

The effect is to narrow the waist and hide the welting stitches, giving a pleasing flow to the shoe.

Signs to look out for are the transition between the sole edge and the bevelled waist edge. This should be seamless and smooth. It is highly skilled and takes a long time to master. The other key element is the tightness of the bevelled edge to the upper. There should be no gap and you should not be able to see the ugly structural stuff underneath which is holding the shoe together.


So if you want to tell if is bespoke or not, then look at the waist. But you know, if you are wearing the bespoke shoes yourself, then you don't care so much about the waist, bevelled or not. Why? Because you care more about how they feel on your foot; how they fit you perfectly; how they caress instead of rub your feet; how when you are walking all day from one place to the next you do not even notice you have them on. That to me is the joy of a bespoke shoe.

And you know what else? Once you try them, it's hard to go back. Like so many of the finer things of life, I suppose.


Now then, back to shoemaking. My little pearl this week is a tiny and inconsequential thing called a side lining (are you detecting my ambivalence?). This is an extra piece of leather which is inserted between the lining and the upper, from the end of the stiffener to the toe puff.

Why use them? Well, they add substance to this area of the shoe which can, over time, sag out with the pressure of the toes. When I was an apprentice with Lobb, they insisted on putting them in every shoe. I do not adhere to this practice.

If the upper and lining are substantial, then I don't. If there is a wing cap, likewise. If the foot is slender, also. If the shoe needs to be lightweight or for a hot climate. And if I can't be bothered to make them (that is a joke).

I have a little cardboard pattern and cut out 4 side linings, reversing 2 of them for inside and outside.


You then have to skive to nothing along the edge that will be on top so that you cannot see an ugly ridge.


When ready, you dab a bit of paste on both sides and place them between the stiffener and the upper, making sure they are long enough to go over the toe puff.

Then last your shoe as normal.


At the stage where you shape your toe puff, you must glue down and shape your side linings so that they are invisible under the upper. Et voila.

Hope that helps all you budding shoemakers. Let me know if you want any specific areas covered.

Until next week, happy shoemaking!

Monday, January 24, 2011

January course done and dusted!


Time for a post from The Other One as we settle back into our new, two-studio routine.

The last week of our first January shoemaking course fled by in a blur. It all went to plan until the last few hours which culminated in an impromptu polishing class from former military man David as I battled to get his shoe from his last.


Lesson learned ladies and gentlemen - 20mm not 26mm nails in your sole and split lift; not too many nails; and don't punch them too far through please! My back and arms have yet to recover but at least his last finally came out. (Sadly not so true for Rosie whose lasts and shoes refused to part from each other. JD will be applying his muscles to them this
week so fingers crossed).

But what a great group they've been. They gelled so well that I felt like the new girl at school on Monday when I took over the shoemaking reigns.


JD assured me that the first week was a breeze and our four shoemakers in waiting have proved very capable with good hand eye co-ordination, some of the fastest stitching we've seen from a newcomer and with excellent results.

But week two is often more challenging as muscles and brains start to ache and levels of concentration fail. First sole stitching, then nail punching and finally heel building stymied each and every one at one time or another during the week.


But all four students kept apace with one another and although the girls lead
the way for much of last week the boys caught up towards the end. With heels built we finally got to focus on the finishing on Friday and Saturday.


Thanks to a final last push and really hard work the overall finish on the shoes is possibly the best yet, with good, sharp sole edges and smooth, gleaming heels - testament to some serious effort with rasps, glass and sandpaper.

The bonhomie was almost our downfall as I urged, cajoled and coaxed them to concentrate so that they would all finish on time...but we pushed on and managed time for bubbly and a sweet treat as certificates were handed out at the end. Well done guys and we look forward to seeing your second pairs!

Going back to our new life in two locales we have both found it strange not working next to each other every day. (Well I say strange but it has its benefits and I am sure JD finds it peaceful in the studio on his own). But I can't help texting and phoning to share news, gossip or otherwise. It helps to keep communication channels open and ensures we know what the other is up to! Mondays are studio days for the two of us and are an all-important day for catching up face-to-face, admin., decision-making and designing.

The rest of the week the studio seems luxuriously spacious with just one body in it and is a total contrast to being under the spotlight at Gieves.


It's rather a nice way to split our time. Half the week we get to be 'living craft' and have to think a little harder about how we look - we have chosen a 'uniform' of smart shirt and jeans for shoemaking that is practical, but smartish and the rest of the week we can be more casual.

But Gieves' surroundings is already influencing us. I am smitten by the beautiful tailoring the team at Gieves sport - particularly the sports coats and three-piece suits - and I hope to start off by investing in some tailored wasitcoats as part of my 'uniform', in due course. JD too I know likes the cut of Gieves' jib and is already sporting a very smart Crombie!

So until Friday and some more top shoemaking tips from Mr D, have a good week.

Friday, January 21, 2011

Spade Welt 2

Right, here we are again. Week two of the carreducker shoemaking course is nearing its end. The Other One is reporting good progress, but I have no proof as yet. I suppose that when I go in on Saturday, I will find out. I am looking forward to seeing how they have got on. My lovely students!

As a result of the course, I have been ousted from Bloomsbury and have settled myself into Gieves and Hawkes for the week. It has been interesting seeing the daily running of the shop from closer quarters. Normally I am here for two days, then do not return for a while.

They have installed a shoe shine service with a very excellent practitioner. He learned his skills in Italy and produces an immaculate high gloss military shine for an exceptionally reasonable £20, considering that it can be up to three hours work to achieve the best results.
There is also a quicker shine for £10 for those who cannot wait.
We have sneaked him a few pairs of ours to shine and the results are brilliant (excuse the pun). It's like having a new collection of sample shoes.

Now, back to all things bespoke shoe. A couple of weeks ago I started showing you a spade welt and had left the shoes ready to welt. Once you have welted them, you are ready to trim the welt to size. This is where the spade part comes in. I like to trim a close welt apart from the toe and the waists. You must draw on a pleasing curve which can be quite tricky. I always end up with a very thick pen line. If this happens, you must mentally pick where you are going to cut and then go for it.


This is where you throw out the curve on the waist. Both sides of course.


Push the line out on the toe too.


The idea is that you barely see the close welt apart from at the waists where it curves out and back under quite quickly.


This is the welted shoe. Seen from below, you can see why we call it a spade welt. It is very striking. And it is the sort of thing you only really see on a bespoke shoe. It is these kinds of details which stand bespoke shoes apart from what you can buy off the peg.


I am going to finish them today, so will post up some shots of the finished shoes. I am hoping they are going to look great. Fingers crossed. It's funny, until you have rasped and finished the shoes, you never quite know whether they are going to be absolutely gorgeous or simply rather lovely. You will be able to judge for yourselves next time.

So, until next week, happy shoemaking!

Friday, January 14, 2011

New Shoemaking Course For January

Due to popular demand, we have introduced a new shoemaking course. And it started this week, which is excellent, because I really enjoy teaching it.

Our previous courses have been completely full and we have had a lot of people who have wanted to participate but have been disappointed. So we decided to start a third each year.

Just one comment while I remember, if you are interested in doing one of our courses, I really recommend that you book early because they fill up quickly. We get a lot of applicants asking to join a couple of months before a course is due to start and this is just too late. We need more time than that just to get the uppers made. So if you want to do it, book early. We already have people signed up for May and August.

We have a lovely group of people on the course. All English this time, which is a first I think. We have had students from all over the world - USA, Canada, Taiwan, Japan, Germany, Spain, Australia, Indonesia.

I also think that we have a welting phenomenon going on. Now welting is generally considered the hardest element of the whole process. We always ask students at the end of the course what bits they found hard and welting usually comes out on top of then list.

 We started welting yesterday afternoon about half an hour before the end of the class, and one particular student had already completed half of the shoe. That's not short of the pace I go at. We shall see how things pan out today.


Thread Making

,


And that, as they say, is that. Not much making of bespoke shoes for me this week, but I finish teaching tomorrow (yes, working on a Saturday!), so Monday will be back to normal as I hand on the responsibilities to the Other One. Our target is to have started our sole by then, but we shall see.

Until next week, happy shoemaking!

Saturday, January 8, 2011

carréducker In The FT's How To Spend It

This is very exciting, an article about us in the Financial Times' How To Spend It online magazine. A big thank you to Dominic Lutyens from us.

And apparently, we are in this weekend's FT hard copy too with the Winkers.

It's a carréducker special edition by the look of things.

Friday, January 7, 2011

Spade Welt And Happy New year

Greetings fellow shoemakers and enthusiasts. Welcome back to the blog and let us at carréducker wish you a very happy and prosperous 2011. We hope it is going to be a good one!

After a quiet and restful week off, we are back at work and raring to go. We have our shoemaking course starting here at the Bloomsbury studio on Monday which is very exciting. Looking forward to meeting our eager students.

Life at Gieves and Hawkes continues apace and their customers really seem to appreciate what we are doing. Orders are buoyant and we are very happy there. Not so sure about working on Saturdays, but that, as they say, is retail.

First week back and the first pair I have to make is quite an unusual one - a spade welt. This construction looks best when used on a long, elongated pointed toe, like the black wholecut on our website.

The spade welt is so called because it resembles an ace of spades. This is achieved by throwing out the welt at the joint; pulling in the waists on both sides; and elongating the welt at the toe. I generally use a close welt because I think the lines are smoother and the result is less bulky than if you use a normal or wide welt. The combination of components elongates the shoe and is really quite elegant.

When you prepare your insole, do it as normal, except that at the joint, you move the outside line out by 1/16th of an inch. Exaggerate the curve of the waists and move the line out at the toe (again by 1/16th of an inch). Then last your shoes as normal.


At this point, you need to mark the edge with a silver pen. First mark your heel points. Across the bottom and at the sides.


Now mark the line across the joint.


Finally you need to mark the point on the feather edge where the awl will come out. This is a fraction in from the feather edge. Remember to throw it out at the joints and the toe.


Follow the curve of the holdfast/feather in the waists. These should be elegant and pleasing to the eye.
When you are making the pattern for this shoe, you need to leave more lasting allowance in the waists for these curves.


Your shoe should look something like this.


You can now welt the shoe as normal. The aim is to overwelt at the joints and toe so that you can extend them (or leave them full) when you trim.

Next week I will show you how to trim the welt before stitching on the sole.

So, until then, happy shoemaking.

PS May I apologise for the late post this week, I had an IT incident with our new computer. Basically I couldn't work out how to upload the pics. Such a dunce!

Tuesday, January 4, 2011

A Morning At Carreducker

Lovely blog post on Men's Flair by Stephen Pulvirent. A big thank you to him. Hope you like it.

A Morning At Carreducker