Friday, August 26, 2011

1 New Shoe

After the madness of blogging every day for 12 days between us during the course, I have been taking stock of the blog and how it is going. I must say that we are delighted with it. When we started it in 2008, it was a real step in the dark, we had no idea what to expect. We wanted to share our passion for handsewn shoemaking, but  did not know how to do it particularly.
And when I read the first posts now, I can see how little direction we had, but soon enough a pattern emerged and the format of doing mini photo essays on very detailed aspects of making bespoke shoes became the norm.

And I think we have had a great response. The validation of our readers is what makes it worth it. Blogging is a very democratic format - people vote with their mouses (mice?). If nobody reads it, then it's just a vanity project. But we are just about to pass 100,000 hits, which feels like a milestone, I mean wow! That is a lot of hits for such a niche subject.
And we get a lot of contact from aspiring shoemakers around the world, both comments and emails, so we know that people are being inspired to pursue our wonderful trade - it's really fantastic.

So, a great big thank you to all of you who are reading this.

As it happens, we had a very satisfying thread started on Style Forum this week, which gave us some very positive feedback. Check it out.

http://www.styleforum.net/t/262343/shoe-making-blog-very-good-one-carreducker

I especially like the quote from the eminent bootmaker D W Frommer II, "the blog is the best one devoted to shoemaking on the Internet". How fantastic is that? We will certainly be quoting that from now on.

I am not trying to blow my own trumpet (well, just a little), as much as emphasize that blogging can be a bit of a lonely activity, so all the feedback you get spurs you on to continue.

This week has been a case of back to the grindstone. Catching up on all the stuff we didn't do while we were teaching.

I finished a rather elegant pair of shoes which are for a wedding. I really like shoes which combine colours and textures, so the navy suede and black calf combo really works for me. And I like the slight twist on a classic design. Being critical, I wish we had blacked the edge of the calf on the vamp and the quarters. This is usually done at the end when you polish the shoes. It would have improved the look. But you always learn something new.


The other thing we did this week was some repairs to shoes we made way back in 2005. It is always good to see how your work stands up to wear, and I was pretty pleased with these shoes. We replaced the top pieces, put on toe plates and gave them a thorough clean and polish. The results are good and the shoes have a lot of life left in them.
It was interesting to see designs we had done years ago. I still like them, it must be said.


The patent shoes had glitter all over them which was very difficult to get off as it sticks to the surface. I had to take it off piece by tiny piece.
And you can see from the last photo that he has unusually curved feet. Some people really need bespoke shoes!

Well, dear readers, that is all for this week. have a great week and, until next Friday, happy shoemaking.

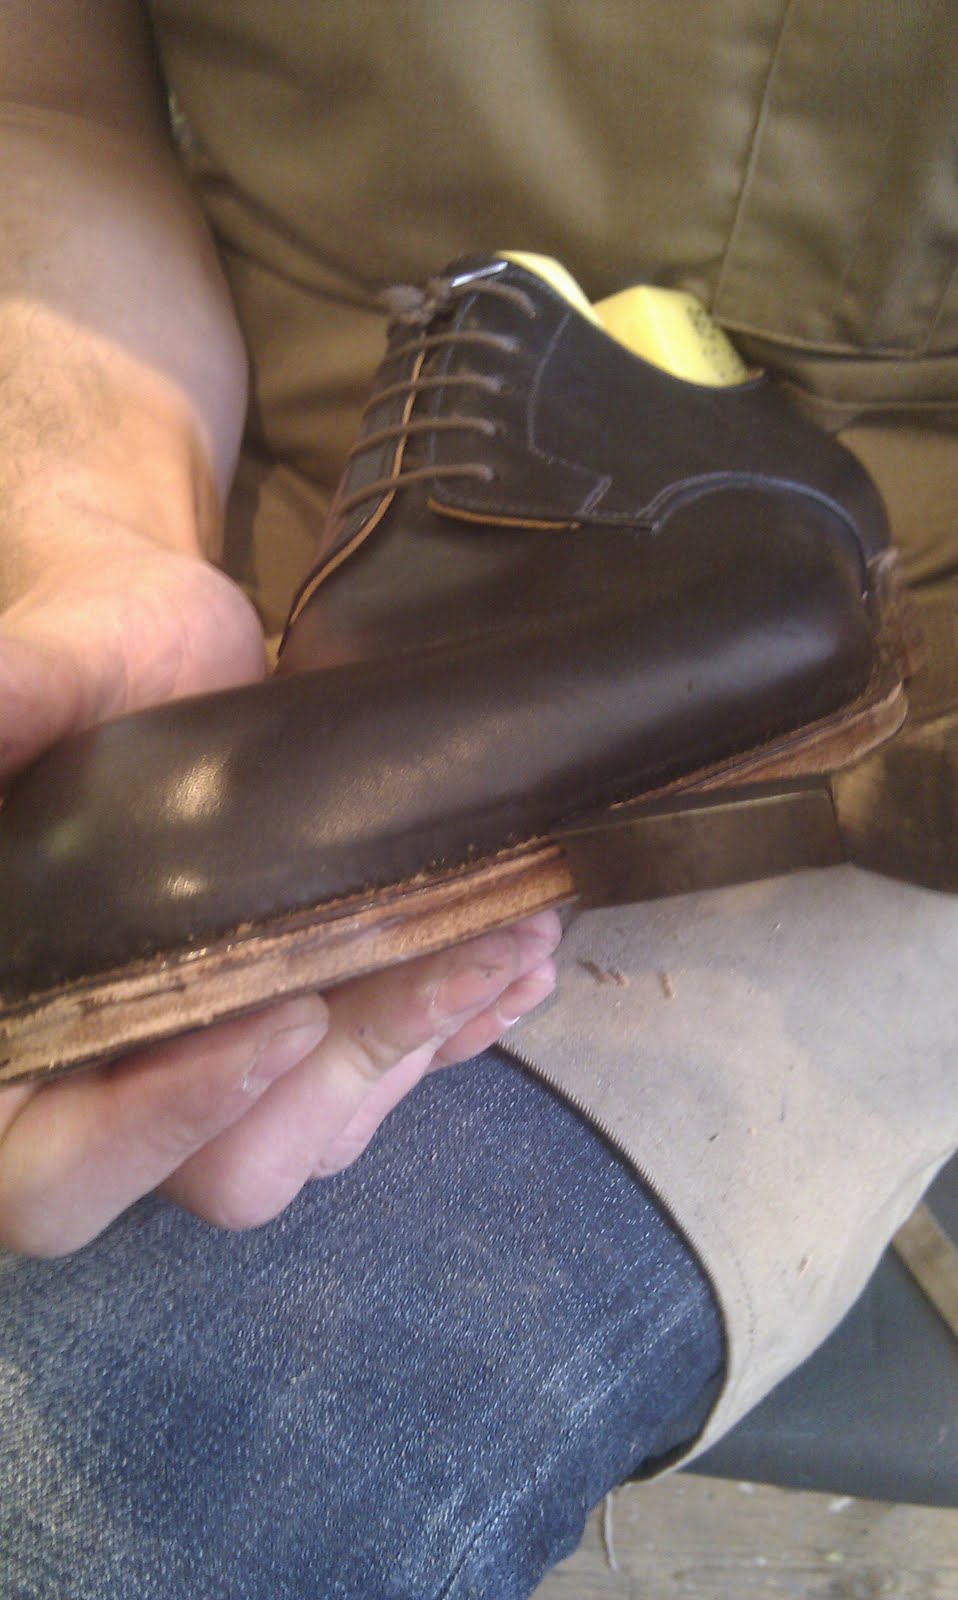
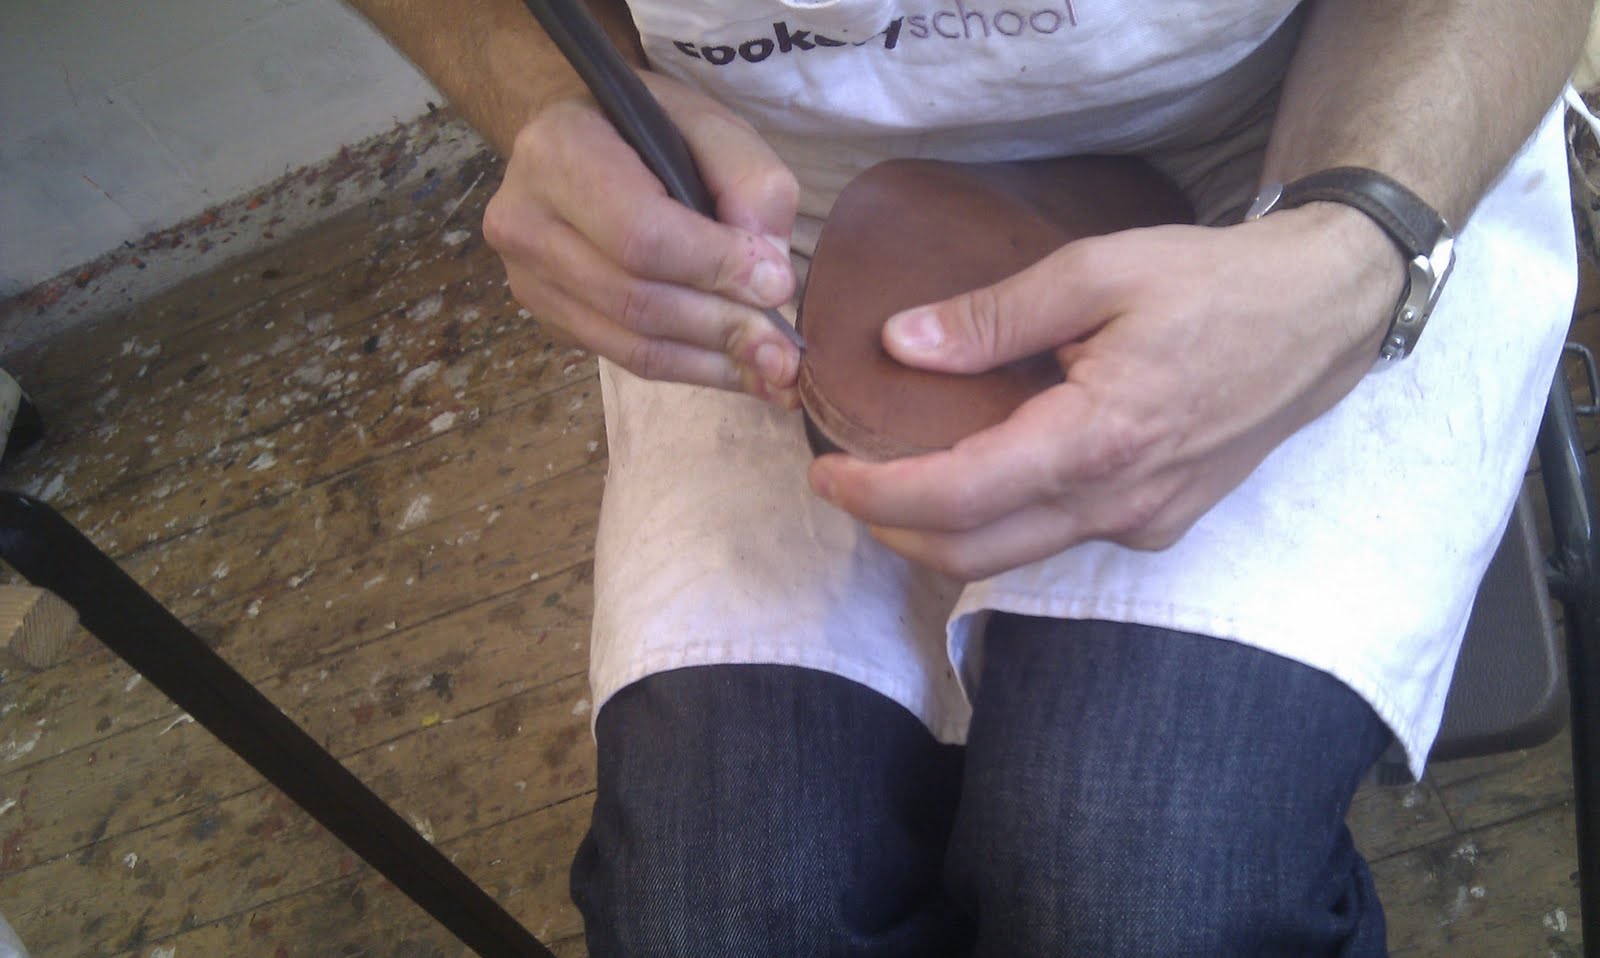
PS I have rectified the little white edge on the vamp and quarters with a pen and a steady hand - nerve wracking!

Sunday, August 21, 2011

Final Day (12) - Shoemaking Course

One thing I did not mention in the Day 11 post was our afternoon visits. First we went to see our good friends at John Lobb Ltd, where we saw all the processes in the making of bespoke shoes. Last makers, clickers, closers and makers. It was a fascinating visit, much appreciated by all the students.
We then went to Gieves and Hawkes where we saw the carréducker concession, the 'Goldfish Bowl'. Again a very interesting visit and the chance for the students to see our handiwork.

And so the end came. The final day, a mad rush to finish everyone's shoes.

We started with setting the edges. This involves getting rid of the lips formed by the sanding, re-fudging the stitches and passing over a hot edge iron. This gives the edges a smooth finished look.

Then we had to finish the soles and top pieces - glassing followed by 3 grades of sandpaper.

Next came inking - black all over for a black shoe


Then came a layer of polish which we burnished with a cool heel iron to set it in place. This stops the polish marking carpets!
Two more layers of polish and a lot of elbow grease to give a lovely high shine.

The final furlong is wax on the heels and edges. Three layers on the heels put on cold and ironed in. One layer on the edges put on hot and ironed in.
Take it all off with a cloth to give a shiny surface.

Seat wheel round the seat to give those characteristic little lines.

Single lipped iron on the heel edges to set them hard (can you feel the rush?)

Then a quick (or slow if they had the time) clean and polish and that is a wrap.

We pulled the lasts, put in the laces and tried them on. Fantastic! The work this year was of a very high standard, as you can see. So a very big congratulations to all the students. Nice job!

High Shine Polish


The Happy Group

And the rewards of their labours were not only a wonderful pair of handmade shoes to keep, a tool kit of shoemaking tools and the knowledge to continue making shoes, but a delicious cup cake washed down with a glass of champagne. What more could you ask for?

So well done lads (yes, all men this year, come on women of the world, you too can make shoes). A thoroughly excellent twelve days work.
In fact, there was a little sadness at the end of the day that the course was over, which meant that they all had to go back to normal life and work.

It makes me think - I love my job! How lucky Deborah and I are. The jolly shoemakers, ho ho.


If you feel you would like to do one of our courses, the ones for 2012 are advertised on our website

www.carreducker.com/courses

So take a look and sign yourself up. You won't regret it.

Until next Friday, happy shoemaking!

Friday, August 19, 2011

Day 11 - Shoemaking Course

Finish, finish, finish. This is what your shoes will be judged on. Most customers do not know about welts, stiffeners, fudge wheels, the quality of your lasting etc. What they see is the finished shoe and that is what they judge. So it matters!

Today the students rasped and sanded till it hurt. Lots of huffing and puffing, but they got there. The results are great.
We use three grades of aluminium oxide paper (80, 120 and 240) in succession to achieve a glassy finish. we use a sanding block on the heels and a rolled up piece of paper on the edges. This gives a slightly concave finish which marries perfectly with the convex body of the edge iron.

Sanding the Edge

I think the results are fantastic.

Glassy Finish on Heel

Some of the students went on to finishing the edges with the edge iron. This involved cutting off the lip on the top of the welt with a knife; re-fudging the stitches; rasping off the lip on the underside; and ironing away with a hot iron.

Setting the Edge
After this came glassing the sole and the top piece ready to sand them. Again, three grades of paper and a peachy smooth finish.

Glassing the Top Piece

The really speedy ones even inked the shoes with black ink. They really look good now. Unfortunately, this is the stage when any imperfections on the finishing will show up. One of the hard things about doing something complicated like making a pair of shoes is that you don't know what you are aiming for or why you are doing something in a certain way, or what consequences doing something badly now will have further down the line. But that's life folks!

Inking the Sole

Black All Over - Lovely!


Last day tomorrow, can't wait. I am a bit anxious about everyone finishing, but we should be fine.

Thursday, August 18, 2011

Day 10 - Shoemaking Course

So, day 10 arrives and the students are finishing their heels. Most of the day was spent on this and everyone finished building them.  Final lifts; cutting the heel breast; putting on the top piece; and cutting the seat.

Cutting the heel breast

Nailing the top piece


One very important step is to check the level of the heel using a glass board. Put the top piece under and check how the heel is sitting. We also check the heel spring at the toe. The tip of your finger should just fit under the toe.


Next comes rasping, glassing, and sanding.

Rasping

Glassing


People ask why we don't use a wheel for this. Well, there are two things. One, it is traditional to do it this way, and we sell our shoes as a traditionally made craft product, so we should do it properly. Two, if you are making shoes on your own, it will take a long time to make buying an expensive machine worth it, assuming you can afford to buy it in the first place.
And anyway, we don't shy away from hard work - ask the students!

Tomorrow will see finishing start in earnest. Some speedy students are well on the way to finishing this already, but most will start tomorrow. The final push to the summit!

Wednesday, August 17, 2011

Day 9 - Shoemaking Course

Ok, Day 9 was all about heel building.

With the split lifts on, everyone got to cutting out their heel lifts. Four in total, two for each shoe.


With the skin side roughed or glassed, they proceeded to attach the first lift with paste and nails. Three in a triangle in the middle to secure it and then a row around the edge. These they clipped and punched as before. Next came trimming, peening and hammering smooth.

Then came some skiving to flatten the heel lift. The object is to  achieve a flat stable contact with the ground on the top piece. This is done by skiving a bit of each lift.

Next came the second lift. Same procedure - paste; nails; trim the edge; peen with the French hammer; and hammer the marks out. All followed by some more skiving.


Once on, they had to shape the heel. Here the convention is straight on the sides and slightly pitched under at the back. This was done with the knife.


After shaping, they had to put the shoe on a flat board and put the top piece under the heel. This is to check how the shoe sits on the ground. It must be flat and stable. No rocking. If the shoes rock or are not flat, more skiving of the surface is needed.


Some of the more speedy workers, managed to trim the seat. This is the part where the heel meets the upper. They drew a straight, flat line, wet the leather and cut carefully, avoiding cutting the upper.


This then had to be trimmed using a bit of plastic from a ruler to protect the upper.


Once the seat was trimmed, they wet it again and peened it close, followed by a gentle hammer to give it a good shape.

Tomorrow we will concentrate on getting the top pieces on and starting the finishing. Rasps at the ready everyone.

If any of this is not clear, please feel free to ask a question. We are happy to help.

Until tomorrow, happy shoemaking

Tuesday, August 16, 2011

Day 8 - Shoemaking Course

Good progress today.

Everyone finished their sole stitching and they have all moved on to heel building.

We had a comment asking if we use any form of nail or peg to attach the sole around the heel. We use nails to do this.
We use 20mm nails, knock them in to half way, clip them and use a nail punch to punch them under the surface of the sole.
Some makers use wooden pegs, but in England, we use nails.


And so to heel building. First up is the split lift or rand which goes around the edge of the heel. It helps to level up the curve of the heel and make it flatter.

The students had to skive the  split lift down to nothing.


Next come five notches and then some hammering to get it into a horse shoe shape.


Now to attach it. Again the students used paste and nails.


Once on, they had to trim with the knife and peen with the French hammer.

Some judicious skiving to flatten the surface followed, et voila! Attached and ready to go.


Next came the first heel lift, again using paste and nails.
Same routine, trim, peen and skive. This time, however, they started to shape the heel with their knives. At this stage the shoe begins to look like a real shoe. It's an exciting point to reach.


Two students are attaching the heel lifts, so we will review this stage again tomorrow when the rest catch up.

Another good day's work everyone!

Monday, August 15, 2011

Day 7 - Shoemaking Course

So week 2 arrives and I take over teaching duties from Deborah. I was happily surprised at the general level of work and also how well everyone is progressing. So far all on target, and a few of them well ahead.

I have said to them that they have to finish stitching the soles by the end of play tomorrow.

Today we were principally getting the soles stitched on. This starts with glueing on the soles. On the course we use neoprene/contact cement for strength, but when we attach soles ourselves, we use rubber solution in the middle and neoprene on the edges. This to avoid pulling out the shank and the cork when you repair the sole.


Once attached, we trimmed the sole to the welt - sharp knife essential.


After this we cut the channel. This requires a steady hand and a courageous heart. This is a flap of leather which covers the stitches on the underside of the shoe. After stitching, it is glued down again.


Next came marking the stitches with a hot fudge wheel - sorry no photo, but it leaves a series of lines on the welt which mark the stitches.

Now comes the stitching. A three cord thread this time with a bristle at either end. And a different awl too. Much easier than welting they all said.


After stitching both shoes, we flattened the stitches with the bone, closed down the channel and hammered it flat. This gets rid of all the creases.
We then opened it up again, glued it with neoprene, let it dry for 10 minutes and glued it down. Some gentle hammering was followed by smoothing the whole sole with a sole smoother (an old chair leg, sanded smooth).


And that was eight hours in class. Tiring but satisfying is the general view I think. More tomorrow.

Saturday, August 13, 2011

Day 6 - shoemaking course

What a week it has been! I've loved teaching this summer's group and have been so impressed with the camaraderie (although I did have to get a little 'school marmy' today to calm them all down as a shoe debate heated up!)


Ian skiving his shank...


Alex smoothing his sole...


Matt straightening up sole edges...

Simon cutting his channel...

A couple of students have proven particularly adept and worked with speed AND accuracy. As they have shown their ability we have increased the challenge, with '11 to the inch' fudge wheels to stitch their soles.

But Alex has already finished his first shoe and Simon is well on his way (and that's despite some left vs right handed stitching technique confusion!)

But it's unfair to imply that it has been plain sailing or wrong to measure them against each other. They are all well on target and, as we say with every course, for some lasting is their forte, for others it's the skiving and for others the stitching. Yes, some do just have a practical aptitude but with anyone, a moment's lapse in concentration can lead to disaster in these later stages of the making process.


Some great, straight stitches!

So who is to say how next week goes? All I hope is that the energy levels stay high (Roberto's constant supplies of cherries, cookies and sweets is helping), they stay enthused, that we encourage their passion for handsewn shoemaking and that they come away feeling that James and I have taught them something new and wonderful...

I dearly hope that, under Mr Ducker's exacting eye, they put in the time and effort to create beautifully finished shoes they are proud to wear.

Sadly I won't be here for the final day as August is proving a very busy month. After three weeks of teaching (including two weeks lecturing in accessories design and marketing at University of the Arts) I am taking a shoemaking break, sneaking off on holiday and to move house!