Wednesday, July 30, 2014

Pattern Making for Bespoke Shoes Course - London Day 3 - August 2014

The midway point is here. How quickly a week flies by.

This morning started with our students flattening the forme of the Oxford they are working on.


This was followed by making the master standard and then the sectional or pattern pieces, including the overlays and underlays (allowances).


They then put the pieces together and checked how they fitted on the last.

Now this may sound straightforward but this is a lot of work because pattern making for bespoke shoes is complex and technical with a lot of input from Fiona, including demonstrations. And hard work from the students of course!


The class is fast moving and fun and the students are encouraged to collaborate and share knowledge - a great way to learn.


Tomorrow they will finish the Oxford by doing the linings and then move on to the final style they will be tackling this week, the Derby.

Until then, happy shoemaking!

Tuesday, July 29, 2014

Pattern Making for Bespoke Shoes Course - London Day 2 - August 2014

And so to day two of the Carréducker Pattern Making Course 2014.


Our Beautiful Sunny Classroom


This morning saw our students finish the linng pattern pieces for the court shoe they started yesterday.

The Lining Pieces Of The Court Shoe

As a side project, they then designed a slipper which is very similar to a court shoe. If there is time at the end, they will cut the pattern pieces.

A discussion about classic styles; shoe terminology; the parts of the shoe/pattern; top line treatments; seam treatments; and allowances.

The Oxford
The second style to be learned is the Oxford.


This began with taping up the last and drawing on the style.


Fiona's Sample Oxford

More tomorrow.

Until then, happy shoemaking!

Monday, July 28, 2014

Pattern Making for Bespoke Shoes course - London Day 1 - August 2014

The Education Space all set up and ready for this summer's
Pattern Making for Bespoke Shoes course.

What a lovely start to the course, welcoming old friends from previous courses and new shoe enthusiasts who will be taking on the intensive shoe making challenge next week and in October.

It was a busy first day. 

Fiona first took the group through the various parts of the last - looking at the pros and cons of wooden vs plastic lasts - and provided an overview of shoe making and the different styles of shoe.
   
The essential tools of pattern making
During the day, the group learned how to tape up their lasts...

The journey from the forme to the pattern for a court shoe
- How to draw a court (pump) shoe design onto the taped last

Tables covered in ' work in progress'
Drawing around the forme to create the standard
- How to take the forme from the last and create a mean forme

The finished pattern pieces
....before finally making the standard that the individual pattern pieces can be taken from.  

Quite a busy first day. Until tomorrow happy shoe making!

Friday, July 25, 2014

Breaking Glass

Broken glass is usually a bad thing, but when it comes to shoe making a well broken piece of glass can be the making of a smooth sole edge, sole or heel. It is a vital part of finishing. 

Whilst rasping the edges blends the layers of leather together to make one surface, glassing then smooths that surface, before sanding with the differing grades of sandpaper.


Picture frame glass is ideal - not too thick and not too thin - and we keep a ready supply in a sturdy box in the studio. The ideal thickness of glass is 2-3mm because it breaks cleanly. Any thinner and you're likely to get more shards and any thicker and breaking it is more difficult with less clean results. 


Use another piece of glass or a file to nick or chip the edge of the glass (make a small dent in the edge).


Rest the edge of glass with the dent in it on a sharp edge such as the edge of your work table or burner. Position the nick so that it is right on the sharp edge. Lean the glass forward at about 45 degrees.


Press gently forward and down with your thumbs, slightly rotating your wrists outwards. 


This should take very little effort. Do not force it. If it does not break first time, then adjust the angle of the glass slightly or nick it again. The gentle pressure from your thumbs should break the glass into two pieces, one with a convex edge and with with a concave edge.


Concave and convex lenses


It is the outwardly curved convex edge that we use to scrape edges and soles.


And in case any of you are wondering how the hammered boots from the last two posts turned out....here they are finished!


 Until next week, happy shoe making!

Friday, July 18, 2014

Finishing with a difference - part 2 - painting and decorating

Last week I was back at square one after taking off my first attempt at the heel. With the heels finally rebuilt in heel lift this time, I finished the heels and sole edges as usual - rasped, glassed and sanded - but concentrated on rounding the sole edges...


leaving the top edge with a prominent lip and the bottom edge squared off.


I used a mix of dark brown and black edge dye and then rubbed dark tan and black polish on over the top. A warm edge iron burnished in the polish and then I found a nifty little tool in my armoury that was perfect for setting the top edge, to keep that all-important lip.


Then my attention turned once more to the heels. Just how to get the finish the same as the samples?


I mixed a number of different pots of edge dye with various amounts of water, so that some were less opaque than others.


Starting with the darkest black/brown sections, I carefully painted in the layers to copy the pattern from the original.


Once I was happy with the painting I used first dark tan and then black polish to darken down and burnish the edges with a warm iron. This time is worked really well.


 The last piece of the heel transformation was to make the bumpy surface. This is what I used!


Not the usual treatment of a carefully built, squared-off heel, but ideal to get the results we wanted. With just the rubber half-sole to go on, and a bit of bunking at the waist, we're nearly there, so until next week, happy shoemaking.

Friday, July 11, 2014

Finishing - with a difference - bumped, rounded and coloured!

This week everything I have ever learned about shoemaking has been stood on its head as I took on the challenge of replicating a particular finish on a customer's boots. The customer is very keen that they should be as close a replica as possible and everything about these boots totally goes against the norm. (I know, I know - what were we thinking!)
Anyway, where sole edges should be sharp and square, they are round; where the heels should be smooth they are dented; and where our usual finish is waxed and smooth, although high-shine the texture underneath is raw.

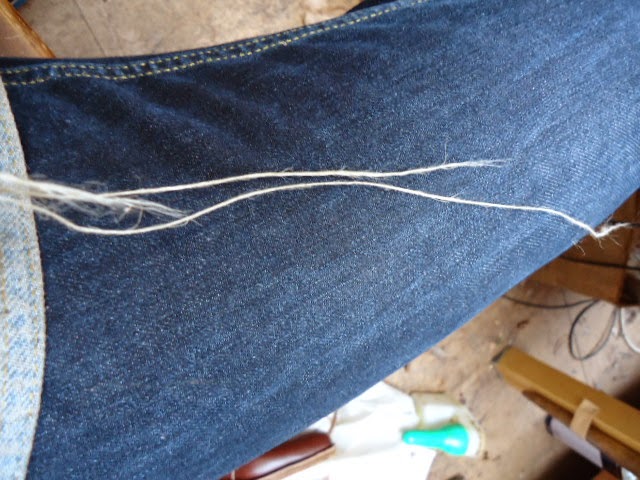
The boots' journey started with the channelled soles...

For now I'm sharing the trials and tribulations of shaping the heels. As you'll have seen last week, I kept the welt full, under-welted with my sole stitches and then sunk the stitches in a channel on the underside of the sole. (The fore part will be covered by a thick rubber mid sole).

With the split lifts in place, I contemplated how best to recreate and colour the heels. We spent some time earlier in the week mixing a variety of dyes to paint onto the edges and also soaking the heel lifts in baths of dye. much was to no avail - the dye penetrated the surface but did not soak into the leather as we wanted despite glassing the surface. Water based dyes were more successful, but still the results were not ideal.    

Finally I decided to just crack on and build the heels and then to tackle the colouring after they were finished. To add to the challenge each lift in the heel is a different colour and is made up of a number of different pieces. My first choice was stiff toe puff belly cut into sections and skived where appropriate.

I got one heel built, but unfortunately it turned out the lifts compressed too much and looked a little too thin.
Disappointed, I pulled the heel off and started again, this time with thin heel lifts. Rather than cut each lift into sections I left them whole aiming to use a screwdriver blade to recreate the dents in the surface where the sections would join.

Although these lifts are a little thicker looking than in the original, the overall result is more successful and will be stronger longer term. At this point I was in two minds whether to rasp, glass and sand as usual. I decided to go ahead as usual. However, when I inked and polished the lifts the end result was too pale and blended; too neat a finish from the original.
Today I will be re-glassing and then staining the lifts darker to see if that will improve things. Fingers crossed.
And that, fellow shoemakers, is what they call 'a cliffhanger'! To find out how they turn out, tune in again next week. Until then happy shoemaking!

Friday, July 4, 2014

Making threads

Hand twisted hemp threads are either the delight or bane of a shoemaker's life depending on whether they are 'behaving' or not. How they behave is down to a great many factors - not least warm hands, technique pulling them through or the weather! The one thing we can help you with is how to make them. 


We use twisted, waxed hemp because it is strong to stitch with and forms a 'plug' in the leather to make the construction more durable. (The wax is home made and you can find the recipe on the blog). We also nylon bristles.

Metal bristles are an option and boar bristles are the traditional choice but for us, they do not have the flexibility or strength that the nylon bristles does (or fishing line, which is what I used when I trained). 

As a rule of thumb, welting threads are 5 cords of hemp x 3 arm widths and stitching threads are 3 cords of hemp x 3 arm widths. (An arm width is the distance between your hands, with your arms outstretched to either side).

While sitting, stand the spool of thread on the floor between your legs holding the end of the thread in your hand. Initially start by just practising breaking the end of the thread to make a long, fine taper.


Roll the end of the thread on your leg so that the fibres untwist. Then pull it GENTLY and SLOWLY apart to make the taper. Keep practising until you are regularly making long fine tapered ends.

Once you have the knack make your threads as follows:

- Pull one cord of thread to make the required length (3 arm widths) and taper the end.
Stagger the taper of the next cord 4 - 5cm in front of the first taper. Run your hand back along
the two cords together to the other end. Check there are no lumps or knots. Now make a taper
at the other end. 


- Repeat the process so that you have tapered ends, staggered 4-5cm apart at each end.
When you get to the last cord it needs to be staggered 11 - 12cm in front of the last taper (see
below).


Twisting the threads:

- Place the middle of the threads on a hook and stretch the two ends taught, holding them
where the tapers start. Using thread wax (a mix of rosin, beeswax and tallow), wax the full
length of the thread except for the tapers. Be generous.


- Keeping the lengths taut, place your foot on a chair or stool so that your leg is at a ninety
degree angle. Hold one end taut (in your mouth or hand) and roll the other end of the thread
on your leg, in one direction away from yourself to twist the cords into a single thread. 

ROLL the thread to twist it
PINCH it so the thread does not unravel
PULL to untangle the ends.

Repeat.


- Keep rolling one half until the cords are twisted together all the way to the hook. 
- Now, swap the threads in your hand and twist the other half of the thread (away from yourself
again), holding the first half taut in your mouth or hand so that it doesn’t untwist.

- Once both lengths are twisted all the way up to the hook, keeping them taut, rub the two
lengths of thread vigorously with a piece of leather along its length to the hook. (This melts the
wax and sets the twists in place (burnishing). 

- Holding the thread taught, run the leather back down the threads to untangle any twists.

Twisting the ends:

- Take the thread off the hook and sit down. Very gently, twist and apply tar to the tapered
ends of the thread in sections starting at the thickest point and working towards the longest
taper. Towards the end, be extremely gentle so that you don’t break the tapers….dab the tar
on and then twist.

Attaching the bristles:

- Once the thread is entirely twisted you can attach the bristles.
- First, key three quarters of the surface of each nylon bristle with a piece of 240 sandpaper.
Then rub the roughened bristle with tar. Be generous. 

- If you are right handed, pinch the very thinnest end of the thread over the bristle and make a
turn away from yourself between your thumb and forefinger, to attach the thread. Continue to
twist the thread onto the bristle away from yourself, making sure the coils are tight and close
together. Feed the thread through your other hand to apply some tension to the thread as you
are twisting it on. Attach the second bristle in the same way

- When you are approximately ¼ of the length of the bristle from the end, stop twisting and
make a hole in the thread with a nail and push the tip of the bristle through the hole. Pull the
whole bristle through the hole till it locks into place. 

- Finally, skive off a tiny part of the tip of the bristle with your knife to create a slanting end and
pull the end of the bristle over your thumb nail to create a curve which matches the curve 
on the awl you are going to use. Simple!

Until next week happy shoemaking and Happy Independence Day to our U.S. followers!