Friday, January 31, 2014

Year of the Horse; shoemaking in England

A painting of Genghis Khan.

First of all Kung hei fat choy! A happy Chinese New Year!

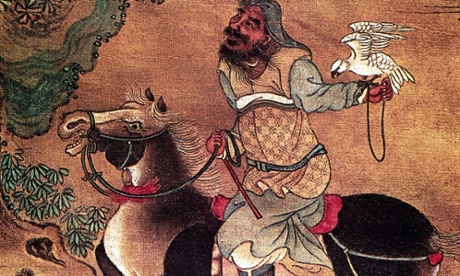
This year is the Year of the Horse, and as a fire horse myself I am hoping for a year of good health and happiness. It will come as no surprise to those of you who know me that people born in the year of the horse are animated, energetic, active, good communicators and witty; with a straightforward and positive attitude towards life! Well most of the time :) But perhaps a more familiar trait is that we stand firm on our principles. With the Mongol ruler, Genghis Khan also a horse, perhaps I should be a little less principled this year for Mr Ducker's sake.  

Now onto shoemaking. We receive lots of enquiries from people keen to get into the business...but who do not necessarily know what the opportunities are or how small the industry here is.

We usually encourage them to visit as many designers, closers, leather merchants, shoemakers, retailers and associated businesses as possible - how otherwise can they know that it is for them? And any experience gained is invaluable.

The good news is that internships, training and apprenticeships do exist in the industry with several companies running their own schemes. But movement is also afoot to broaden what is on offer and to develop an industry-wide scheme. Once details are available we will let you know more about it. In the mean time, it is worth contacting manufacturers directly to see if they have opportunities and to use the British Footwear Association as a resource for news and contacts.
QEST News
We are also delighted to share the news that the Queen Elizabeth Scholarship Trust is trialling an Apprenticeship scheme this year, with a view to establishing it next year, funding permitting. We hope that this scheme will give more micro businesses like ours, who cannot afford the financial commitment of taking on an apprentice, the opportunity to pass on our skills to future handsewn shoemakers. It is a natural extension of the courses that we run and reinforces our position as guardians of the trade and ambassadors for our craft.

Machinists in the closing room of a Northampton factory c. 1920

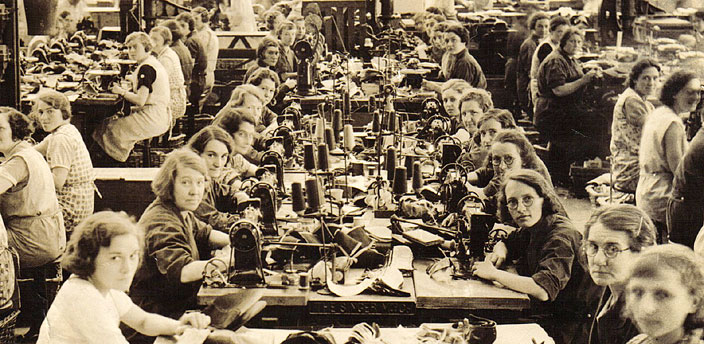
In the mean time, if you're curious to find out more about the shoemaking industry in England then here's a fascinating new website that celebrates shoemaking in Northampton. As you can see, the number of brands may have decreased from 240 in the 1940s to around 34 today, but it still represents a sizeable (and growing) manufacturing industry as the list of current brands shows.

Talking of shoe manufacturing, I'll finish with a piece of carreducker history on You Tube. Top gentleman, avid cyclist and general good thinker, Mr Jon Snow of Channel 4 news fame, is pictured doing four extraordinary and rather cool things.

He is 1) singing 2) Blur's Park Life 3) at an Amy Winehouse Foundation gig whilst 4) sporting a pair of handsome carreducker Half-cuts, and bouncing!  He's also sported them on the red carpet...at the BAFTA's no less!

Jon Snow in black & red Half-cuts at the BAFTAs!
Classic with a twist!
And in a neat segway, the Half-cuts were manufactured for us in Northampton by Trickers!
Until next week happy shoemaking! 

Friday, January 24, 2014

Shoemaking Tools - The Feathering Knife

Greetings, once more, dear shoe folk of the world. Another week, another welt.

We are always amazed at how this blog reaches people and helps them realise their dreams of making shoes. Just this week, a man from South Africa called Heinrich came in to say hello and to tell us about his shoemaking exploits. He basically does everything from scratch with very limited resources in terms of tools and materials, but he says the blog has taught him so much. That is marvellous and we hope this is true of many other aspiring cordwainers around the world.
A slight word of caution here though, feet are complex pieces of kit and shoes have the ability to damage them, so we recommend that people always try to get some kind of teaching if they want to make shoes - it is easy to get into bad habits

During our course we had two interesting visitors. One was Rachel Garwood of the University of Northampton Institute of Creative Leather Technologies who gave the students (plus a couple from the weekly class) a talk about leather itself, its structure, properties and tanning. It was really interesting and a great addition to the course.

The other visitor was Lucie Muir of the Financial Times who is doing a piece about shoemaking courses. She came in and did a bit of lasting, a few welt stitches and asked the students some pertinent questions. We look forward to seeing the finished article.

And so to shoemaking. This week we wanted to look at a tool which is specific to shoemaking, but is not one of those tools which is absolutely necessary because you can use your knife for the job.

The other thing about them is that they are quite hard to find. Ours was given to us by our good friend Marcell Mrsan and I think he sells them on his tool site (not 100% sure about this). It is a marvellous tool and very good quality, so thank you Marcell.
I think Minke in Germany also sell them but I have never seen one of theirs so cannot say whether they are any good or not.
One more thing, they are either right or left handed so make sure you get the right one.

We are talking about the feathering knife. And below are a few images.


As you can see it is a very specific shape. Its main advantage over the knife for cutting the feather is that it has a depth gauge section (on the right of the picture above) which makes you cut a very even depth all the way round the feather/holdfast. This is essential to achieve a flat, even welt with no wobbles or bulges.
Another advantage is that it makes you cut the feather to the correct depth. Most people when they are starting to make shoes are a bit tentative with the depth and leads to a weak holdfast.

Mark out your feather/holdfast as normal.


Cut the outside line with the tip of your knife, wet it and open the groove with your screwdriver.


Now comes the feathering knife. Holding the gauge part tight into the groove you have made, push the knife through the leather. Push forward but also apply downward pressure to make the sure the knife runs evenly inside the groove and the cut is even all the way round the feather.


It should look totally uniform like this. This is very important achieve a flat welt on the finished shoe.


You might need to treat the waist a little differently depending on the construction you have chosen.


On the inside line, we always cut it at a 45 degree angle like this.


And open the groove like before with a screwdriver.


Because of the angle of the cut, it's easier to cut this part of the holdfast with the knife. Plus, the inside cut of the holdfast does not affect the final look of the welt - it is entirely internal.


Note the angle of this cut


This is how the finished holdfast should look - deep and even.


The correct depth makes for a strong feather. Here it is with the hole made, ready for welting.


One slightly tricky thing is to sharpen it. I use the edge of the strop and the flat of it, but you basically have to find a way. The good thing about it is that you don't use it very often so it does not go blunt very quickly.

And that is about it for this week. We hope you found the post interesting and we welcome any comments or feedback.
Plus, if you are a regular reader, please become a follower. Thank you!

Until next week, happy shoemaking!


Sunday, January 19, 2014

Shoemaking Course January 2014 - Days 11 & 12

We can't believe it's already over. This course has really flown by. They've been a lovely group of diligent, conscientious and very hard working students and it has paid off. If the energy levels had been higher they could have been finished by Friday morning.


As it always is with something this intensive, the finishing stages actually took a long time. But it was definitely worth it for the results. Lovely straight edges on the heels, smooth soles and generally well-shaped sole edges.


Hours were spent rasping....

glassing and sanding...


The calm at lunchtime before the final onslaught!
 dyeing, waxing and burnishing...


Cheryl's beautiful natural soles - hope that your husband was impressed with all of your hard work.
 Followed by a few more hours of nourishing the shoemakers...


and the uppers, before buffing the toes to a military shine.


There was even time to go through measuring and fitting up lasts. The fit on all of the shoes was good - even for the non-bespoke lasts - with only small adjustments needed to fill extra space.

And the results? A very happy group with their well-fitting, shiny shoes!
David, Jonathan, Gee, Martin, Cheryl and Rachel
Congratulations guys and we look forward to seeing the next few pairs taking shape. Remember we're only an email away if you need any help or advice! Until next week happy shoemaking!

Thursday, January 16, 2014

Intensive Shoemaking Course January 14 - Days 7, 8, 9 and 10

The time has flown and the students are nearing the end of their shoeathon.

Monday and Tuesday saw our intrepid shoemakers stitching soles on. First they made their threads. Just like the welting threads but thinner - 3 cords of hemp rather than 5.


Wednesday was the day for heel building, starting with the split lift or rand. On this particular one, the notches which help to bend it round the curve of the heel went a little too far. They should stop before the heel marks to avoid them being revealed when cutting the breast.


Two heel lifts went on using paste and nails. The heels were then shaped with the knife.

Today saw them cutting the seat and heel breast and finalising the shape of the heels.

Nicely cut seats

Cutting the heel breast

With the heels built, the students moved on to the last process which is finishing. They started with rasping the heels and edges.


The last two days will be taken up with making the shoes look beautiful - glassing,sanding, inking and waxing.

Until Saturday, happy shoemaking!

Saturday, January 11, 2014

Intensive Shoemaking Course January 14 - Days 5 and 6

Welcome to days five and six of the carréducker Intensive Shoemaking Course.

Day five saw all our students furiously welting their shoes - and very successful they were too.


 Welting round the toe is probably the hardest bit.


After welting, they trimmed the excess upper leather and beat the welt. This compresses it and makes it straight, at 90 degrees to the upper.


Day six started with leather shanks being cut out and skived.


A good trick is to use some chalk to mark the area, press it onto the shank leather and cut it out from there - works every time.


We skive them initially as in the picture above, then we glue them in with contact cement. Once in place, they continued to shape them to make a nice, gentle curve in the waist.


In the fore part we filled it with cork sheeting which we shaped with a rasp.

Once the shanks were in and the fore parts filled, they prepared their soles. These had been soaked and mellowed ready for action.
They were trimmed and glued.


They also made threads in preparation for stitching the soles on Monday.


Sunday will be a well earned day of rest. I suggested they have an early night and don't set the alarm, but I'm not sure all of them will listen to teacher in this instance!

More on Tuesday, with a report on days seven and eight.

Half way through already!