Friday, December 21, 2012

Hand Stay Stitches And Merry Christmas

Hello, one and all. Welcome to the final blog post of 2012. It's been an amazing year and we thank every single one of you who has read our posts; commented on them; become a Follower (please more of you do it, pleeease!); or had any other kind of contact with us. With this in mind, Deborah (yes, it was all her own work) has created a Christmas greeting for all of you.


So, yes, merry Christmas and happy New Year to all of you. And let's hope 2013 is a fruitful and magical year for all of us.

And so to shoemaking. One of the things which mark out bespoke, handsewn shoes is the closing - both its quality and the hand work which is a feature of it.
One of the things which sets our saddle loafers apart is the stay stitches on the band.


There is a total of 16 on this pair which we had to do one by one. And here is how we did it.

You start with the thread which we made with two cords of the hemp thread we use. We used our light thread wax with a layer of tar on the top to make it black. Once it is burnished, the thread turns black.
Attach a bristle to each end.

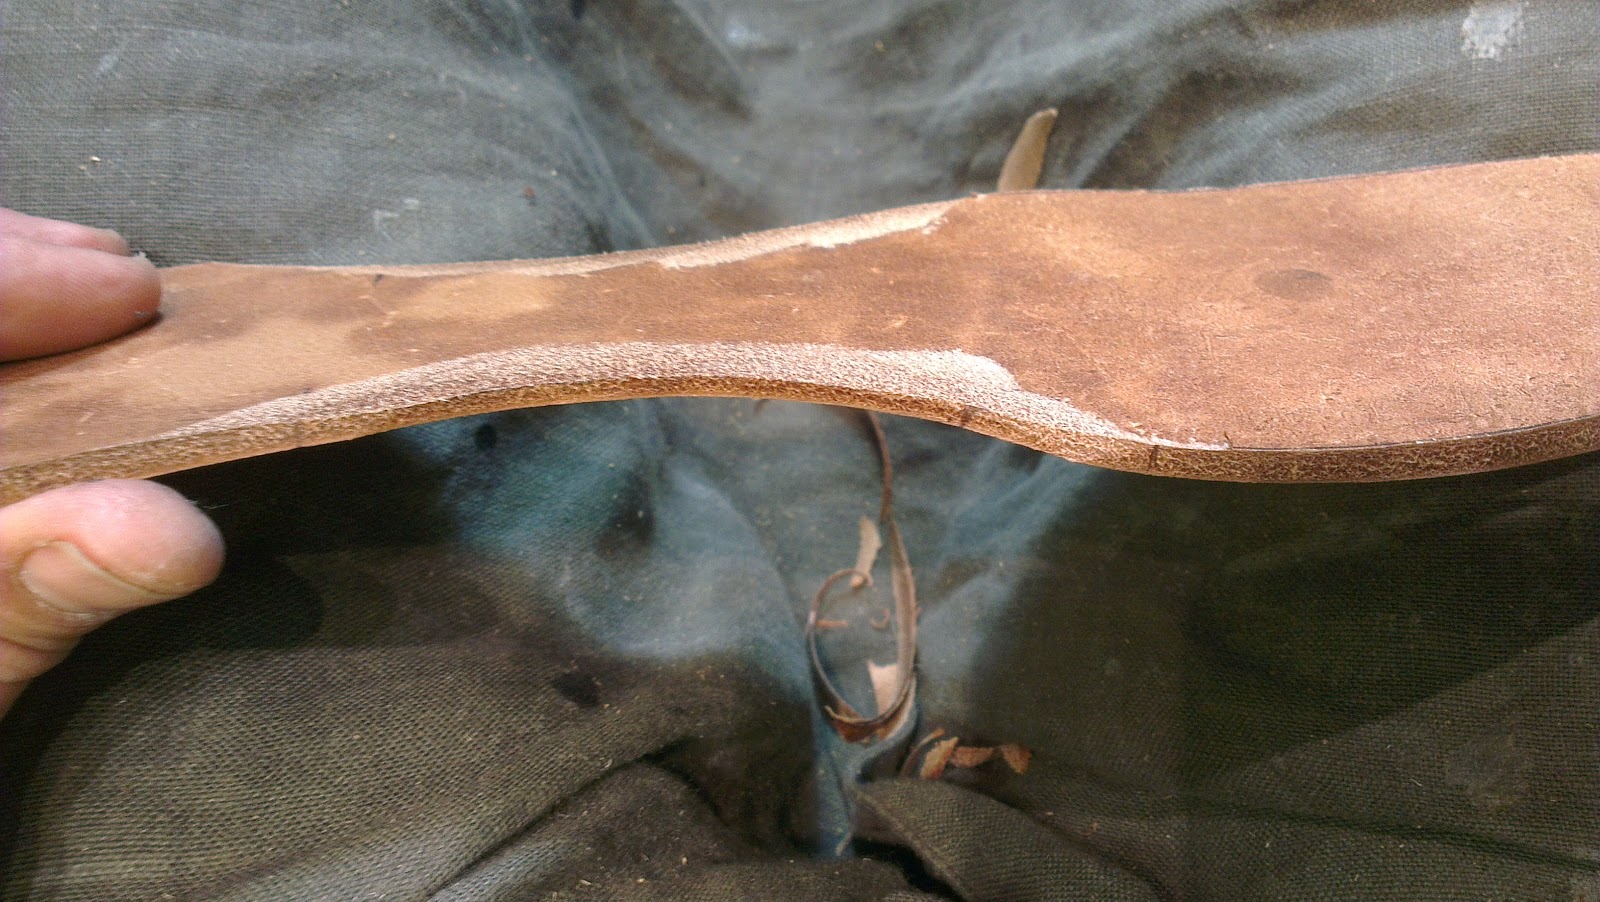
Then you have to mark the holes on the upper with a silver pen. The upper is totally finished and the stay stitches will go through the upper and the lining.


To make the holes, you can use a straight pricking awl or a nail on a cutting board. I like the nail because it makes a small hole.


For the first stitch, put each bristle through each hole.


Then tie a tight double knot on the inside. Cut the threads and tie the ends in a knot with as little spare thread on the end of the knot.


From now on, you have to start each stay stitch on the inside. Put one bristle through a hole, across the top and in through the other hole. Tie the two ends of the thread together in a tight knot and cut the ends. Tie them together again and do exactly the same thing on the next stay stitch.


This is what the stitches should look like on the inside.


The last process is very important. The knots in the thread, even though they are small, could dig into the foot and irritate the wearer. So you have to hammer them flat. Take a lap iron or a cobbling jack. The surface must be flawlessly smooth. The hammer you use must also have a flawless head with no nicks or scratches. Hammer the knots flat.

And that is that. The uppers are ready to last.

Hand stitches look fantastic but they also have a function. They give strength to the shoe in places where they suffer the greatest stress while walking. For example, we use them on Derby/Gibson shoes to stop the facings opening too much.

Here are a couple of examples. Be inventive because people notice these small details.


And so we come to the end of 2012. Providing the world doesn't end today (it's looking good so far, although does the apocalypse respect our international time zones? If Australia makes it through today, are we all ok? ), we look forward to welcoming you back in January. Until then, with a well earned rest to enjoy - happy shoemaking!

Thursday, December 13, 2012

From Chicago to Carlos Place

Well a week on and whilst James has been holding fort, my titian hair and I have clocked up a transatlantic flight, a domestic flight, two cities and a host of fittings and new clients. It was a great trip - warmer than the UK, but I have sworn never again to do a fitting after 8 hours on a plane and the same day I land (never mind 20 minutes after checking in)!  I was not on form...huge apologies Mr.W!

 Thankfully I had a day of designing the next day - a rare treat in the world of carreducker - and visited a fantastic art store in Chicago called Utrecht to stock up on sketching materials. I had a lovely time selecting pens, pencils and layout pads - much better quality than the ones we get in the UK!

There was plenty of inspiration architecturally on the way back to the hotel...

 This store caught my eye - oh so tempting!
 And the Burberry store was across the road - so in a way it felt home from home!
 Friday night I met up with a fellow shoemaker from 'out-of-town' who is joining us on our course next summer. We had a lovely evening talking footwear, life and food...and we are looking forward to welcoming her to London next August.

I stayed at The James - a lovely, buzzy boutique hotel on The Magnificent Mile... (highly recommended if you're passing through).

Back in Blighty it has been none stop since I landed - fixing up lasts from my US fittings, putting through orders and preparing for important business presentations...one of the social highlights this week was visiting our display at The New Craftsmen. We are slightly in awe of the company we are keeping at this beautiful pop up shop opposite The Connaught...it is so exciting to be in a gallery space!
The magnificent Kelvin Smith has been holding court in the bay window...demonstrating the character and craft of a true wordsmith...

And here is our creation - epitomising a true gentleman about town - the bespoke, brogued dress dog collar (in box calf and tweed) and matching bespoke boots...could anything be more dapper?
The handsome hound in the photo is Ruff - very languorous and a gentleman in his own right - who we owe a huge thank you to for modelling. He and the collar were a perfect fit!
So with Christmas just around the corner, if you can, pop in to The New Craftsmen - it offers both a refreshing, unique and exciting shopping experience. Enjoy!

Until next week, our last post before the Christmas break, happy shoemaking

Friday, December 7, 2012

Trunk Shows And Midsoles

Good day to one and all. We at carreducker hope that the world of shoes has been kind and full of wonderous things this week.

As I write, the Titian haired Deborah is in Chicago on the first leg of our trunk show, seeing old customers for fittings and new ones for orders. Tomorrow she will be in New York and then back home on Monday. It has been a successful trip so far and let's hope this continues for the remainder of her time there.

This week saw a great (if brief) mention for us in the BA High Life magazine in an article about men's footwear in England. Great to be mentioned in such august company. A big thank you goes to Mr N Foulkes.

And the New Craftsmen pop up shop at 5, Carlos Place in Mayfair, London has started. They are featuring a pair of our boots and a dog collar we designed to match (very fancy, but it is Mayfair!). And there is a raft of other fine crafts from the British Isles - well worth a visit if you are in London

And so to all things shoemaking. This week I made a pair of pretty regular black wholecuts, their only distinguishing feature being a midsole. Midsoles are pieces of leather which you attach to the welted shoe before you stitch the sole on. They can be full midsoles (all the length of the shoe) or half midsoles which finish just behind the joint.
Generally they are used for two reasons. One to add thickness to a sole without adding too much stiffness. The hide we use for soles is very dense and hard and if you want a really thick sole and just use it alone, you can end up with an entirely inflexible shoe which makes the wearer walk like Frankenstein's monster. The second reason is to make a light square waist.
As many of you know (and for those who don't) a square waist is when the stitching starts at the heel point and goes all the way round to the other heel point. Usually, the thickness of the sole is the same all the way round.

Sometimes, for lightness, customers ask for a light square waist which requires a half midsole. And here is how you do it.

Take a welted shoe (a pair is usually better however) with a shank and filler with the welt trimmed.


For this midsole I used a piece of belly, but a stiff piece.
Place the shoe on the midsole and draw round leaving yourself a margin. You need to mark the joint too (the widest part of the shoe at the front) and mark a line 1" behind it. Cut out your midsole.


Skive the midsole from the joint mark back to nothing.


Use contact cement and glue the midsole in place following the lines you have drawn. Glue it skin side up.


Hammer it into place. And trim it to the welt.


Prepare your sole as normal.


At the joint where the midsole is, mark where the skive starts and finishes. Mark this point on your sole too.


From the marks back towards the heels, mark a line to half the thickness of the sole.


Skive this line to thin the sole. If you want a very flat waist, you will have to skive all across the sole. If you want a slightly domed waist, you can just skive at the edges - it depends on your house style.


Cement the sole to the shoe with contact adhesive.


Attach the sole and trim off the excess.


Stitch as normal. You can see how the midsole looks in this picture.


This shoe is not finished, but you get an idea of how the waist is much thinner. It gives a slightly more elegant line to the sole, a slightly dressier look. Nice, huh?


And that, as they say, is that. We hope you have a great week and look forward to next week's exciting instalment. Until then, happy shoemaking!