Friday, January 27, 2012

Life long learning!

Our course has finished and we are gradually settling back into the weekly carreducker routine splitting our time between the studios at Cockpit and Gieves & Hawkes, seeing clients for fittings, taking new orders and finishing shoes.


Chatting through the last two weeks, we realised that we've been teaching our shoemaking courses for over five years (we can't quite believe it)! It's been a learning curve for us as lecturers and we've never let ourselves become complacent.


We always try to improve the notes, teaching methods and our approach every time. In the early days we taught much as we had been taught on our apprenticeships - with very little explanation as to why a process was being done or why it was important. Time was partly to blame, but we were also concerned that explaining everything would actually cause more confusion and might make the process even more daunting.


The feedback from students on the courses has really helped us to improve and try new ways of teaching. It is invaluable in fact (so thank you to everyone over the years who took the time to share their praise and criticisms). The positive comments are obviously much appreciated - "it exceeded our expectations", "the teaching was excellent", " I learned so much" - but the constructive criticism is even more valuable.


After this last course we have realised that we do need to explain even more of what is going on and the whys and wherefores.

So our New Year's resolution (well, end of January resolution) is to do just that on each day of the course, starting in New York - what we are going to be doing, what the aim is and where we need to be by the end of the day. It will never be as a strict as that because students invariably work at different paces or find one part of the process easier or harder than others, but it will give everyone a clear goal for each day and hopefully a better understanding of why things have to be done a certain way.


We will also be adjusting the course outline to emphasise even more just how mentally and physically demanding it is. A "shoemaking boot camp" is one phrase that keeps cropping up and not undeservedly so. (Luckily it is also usually accompanied by "but really, really rewarding")!

We do have a great time on the course and it is universally described as at worst "rewarding" and at best "one of the greatest thing's I've ever done",  but it is no holiday; we work our students hard!


So, you have been warned....but we hope also very much tempted to give it a try! We have a couple of places left for both New York and London so why not join us? In the mean time, look out for some exciting course news next week, but until then happy shoemaking.

Sunday, January 22, 2012

Final Day Of January 2012 Course

And so it all ends, another course over. And everyone finished their shoes - fantastic work all round. It is always nice to get to the last day, pull the shoes and try them on. I think the students get a real sense of pride and achievement having completed such a demanding course. And, believe me, it is very demanding - hard work and challenging new skills to learn.

Here is a selection of some of the things we did on the last day.

Inking The Heel Edge

Melting The Wax On The Heel Edge

Polishing The Natural Sole

Inking The Edges And The Welt

Drying The Soles

Burnishing The Soles

Inking The Edges

Single Lipped Iron On The Heel

Finished Shoes!


Most Of The Proud Students

Plus A Proud Teacher

The Day was finished off with a bottle of bubbly and some delicious cupcakes, followed by a visit to our friends at John Lobb and our workshop at Gieves and Hawkes on Savile Row. So, congratulations to all the students, and roll on New York in May and London in August. We still have places left on both courses and the deadline for New York booking is March, so if you are interested, do't hang about. Until next week, happy shoemaking

Friday, January 20, 2012

Week 2 Day 11

After a frenzied day of cajoling and coaxing, we hit our target of setting the edges by 5.30, so well done everyone. It is hard work, but really worth it now as the shoes are taking their final form.

We started off by doing the last bits of rasping we needed to get the final heel shape and edges.

This was followed by glassing and sanding. We used 80, 120 and 240 grit paper to achieve a smooth finish.


Glassing


Glassing

Sanding The Edge


After this we prepared the edges for setting with the edge iron.

This involved gently rasping away the lip on the sole side of the edge. And ploughing off the lip on the welt side. We also passed the fudge wheel round again to really set the stitches well.


This was followed by setting the edges with a hot edge iron after previously wetting and putting on a little soap to lubricate the iron.


Some even got on to glassing and sanding the sole and top piece.


Last day tomorrow. Finishing the soles, inking the shoes, waxing the edges and pulling the lasts. Yippee!

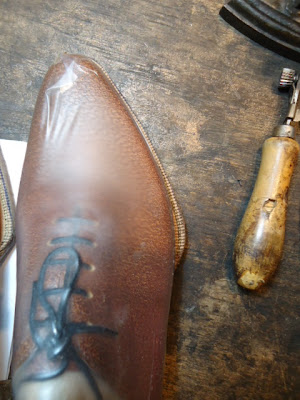
And just a little teaser, what am I going to do with this?


Until tomorrow, happy shoemaking!

Thursday, January 19, 2012

Week 2, Day 10

Week 2, day 10, the final push to the summit.

It's all heels, heels, heels. We have been adding extra heel lifts; cutting the seat; and putting on the top piece. The pace dropped a little this morning, but I am hoping to crack the whip a bit this afternoon and start the finishing process. Now that might sound like it is quick, but, believe me, good finishing takes time (especially because we do not use a machine to do it!).

Here are a selection of shots of what we have been doing today.

Trimming The Top Piece


Trimming The Heel Breast

Nailing The Top Piece


Rasping The Heel Edge
The Happy Class


Friday tomorrow and it will all be about making the shoes look pretty. As they are now, we could pull the lasts and they would function perfectly well as shoes, but they don't look good - they will by Saturday! Until tomorrow, happy shoemaking!

Wednesday, January 18, 2012

Week 2, Day 9

Everyone arrived today with their second shoes stitched which meant that we could get into heel building from the word go. We had a very successful day and the students have caught up considerably. I am more hopeful of finishing both shoes than I was yesterday. Excellent!


Attaching The Split Lift


The Second Lift Goes On With A Row Of Nails

Cutting The Heel Breast

Marking The Heel Breast On Both Shoes


So, dear readers, more tomorrow. We will get the heels finished and move on to finishing. Until then, happy shoemaking.

Tuesday, January 17, 2012

Week 2. Day 8

Well...it's all in the balance. If things go smoothly and nobody has any hitches, we could finish both shoes.

We did some sole stitching today, but we also started our heels. They have trimmed in and peened the seat on both shoes and they have prepared the split lift or rand ( the first section of the heel)

We put nails in, clipped them and punched them around the heel.


Preparing the split lift by skiving it.


Finished split lift, after hammering into a horse shoe shape on the flat iron.


I have sent them home with the remaining stitching to be done on the second shoe. Most are round the toe already. If they all come back witht them done, then it's game on. Fingers crossed!

So, until tomorrow, happy shoemaking!

Monday, January 16, 2012

Week 2! Day 7

So here we are and the time has come to hand over the reins to Mr Ducker. I transformed into a sargent major today to inject some energy, a sense of timeliness and to try to get everyone motoring along a little bit faster. 

We are behind! Can you believe it? This may be the first time when we have to say to the students that they can only finish one shoe. I know it sounds a bit harsh, but they have so many more processes to learn that this really is the best solution.

 Somehow the processes just aren't going in. Usually by week two they are becoming second nature, but not this time. Disappointed does not even begin to capture how James and I feel. We love seeing a group of students complete their shoes and try them on at the end... We think that once you have skived, trimmed, stitched, used the paste and contact adhesive and done some stitching once, you really only need to keep practising to finesse your techniques and capabilities with the tools. Anyway, let's hope the energy levels lift. 

After a massive final push this afternoon all soles were on and by 6pm the final student had been shown how to stitch the sole. Some brave souls even took it upon themselves to cut the channel - not easy on a first attempt (nor when you are under pressure)! But everyone has gone home happily with homework to complete so soles will be stitched by the end of tomorrow.

 I'll be at Gieves & Hawkes tomorrow so I am looking forward to regular updates and hopefully the good news on Tuesday that the second sole is stuck and stitched! Good lucks guys - heads down, knives sharp and go!

Saturday, January 14, 2012

Week 1 - Day 6

I can't believe that it has already been six days. The students have done so much but today is a day for heads down and cracking on with welting, shanks and cork so that we are all ready to stitch soles on Monday... a little later than usual but nothing to panic about.

Time flew so fast today that I didn't even have time to take any pictures (sorry!). Threads are part ready for Monday and we concentrated efforts on getting the second shoes welted and making sure that the welt stitches were as tight as could be. The combination of threads and toes proved a challenge - bringing the welt in tight to the toe so that you couldn't see the stitch and so that the welt stood at 90 degrees from the side of the shoe. But the results are good and after some hammering we have decent, strong welts to move on to the next stage.

Both Godwin and Brian have found their fortes in welting I think - Godwin's for excellent strength and Brian's for clean, neat stitches. Heartening to see!

With each new process the students have realised why certain  requirements were made on them in the previous stages. So a tightly lasted, smooth toe will make welting easier and neater; if you take too long to last your heel and your stiffener starts to dry out you will end up with a more bumpy  surface on the underside of the heel; and a loose welt? Well, let's wait to see what Monday holds?  

The students are off for a well-earned break tomorrow to rebuild their stamina (with just a little bit of homework to do).

Wish them luck for a busy day on Monday!

Friday, January 13, 2012

Spade welt/Fiddle Waist Clarifications And Day 5

Well, here we are with week one of our January 2012 shoemaking course coming to an end. I am told that they are doing very well and should be welting before too long. I am stepping in for a day today, so I will get to see them all in action.

We had a mention in a great piece in the Telegraph about the new look Gieves and Hawkes flagship store at Number 1 Savile Row.

Another in The National about women in traditionally male trades like tailoring and shoemaking.

And a post on The Tweed Pig blog dedicated to carréducker - fantastic!

Thick and fast is how I would describe it.

Now, recent posts about spade welts and fiddle waists led to some good comments and a few emailed questions, so I am going to clarify a few points.

On a spade welt, it is important to alter your holdfast/feather at the joints and toe. You need to throw the lines out somewhat so that you can subsequently do the same with the welts. It is illustrated in the photos below. You have a normal holdfast and the lines show how you should alter them.
This mirrors the shape you will achieve on the spade welt itself.


Here is a welted shoe showing the width you need at the joint to get the right effect. On this pair, I left the toe normal in the end because it was not pointed enough to make the spade toe work well.


And so to fiddle waists. I said before that I used cork in a sample shoe, but shank leather on a customer's shoes. Well, here is an example of that. Same process, but with leather. This will make the shoe heavier, but it will last indefinitely, whereas cork could crumble away with time.


Same as before, you cut out and glue in the "lifts" and shape as you go.


Make sure the joint area is skived flat with the forepart. Otherwise your shoe will not walk right.


These last shots show how the welt looks when you cut it at the joint and the toe. Try to make them a pair remember.


And here is how the finished welt looks. This is quite an exaggerated one which is very visible when you are wearing them. It will also look better when the edges are inked and finished. I like that curve though.


And this is the leather built fiddle waist with the heel built. Looks just the same as the cork one.


Well, the day got away with me and I am posting this after the course has finished for the day, so here are a few pics. We spent the day thread making and welting which is always a challenge, but everyone is doing very well. More of the same tomorrow I think.


So, until next time, dear readers, happy shoemaking!