Thursday, December 23, 2010

Happy Christmas

Have a fantastic Christmas everyone and a wonderful New year.

And let's hope 2011 is a great year. I have a feeling it will be.

It's my last day today and then it's a well earned holiday... well, staycation.

Here is a festive treat for all of you. The first two pairs of bespoke shoes in a capsule collection we have designed to launch our concession at Gieves and Hawkes. Hope you like them.


I love the matt croc, it gives a cooler edge to a classic tassle loafer. And I also love the military ribbon tug. We went through Gieves military archive to find inspiration and found some truly amazing clothes and equipment.
The hand stitching on the upper which goes all the way along the side to the back seam is masterful. £5000 worth of shoe.


The next one is called the Campaign Boot. We used a military twill on these and were inspired by the Map Room at Number 1 Savile Row where the body of explorer David Livingstone lay in state. Love the chocolate pebble grain and the brass rivets.


So, this is it. The last post of 2010. I will be back on January 7.

So, until then, happy shoemaking!

Friday, December 17, 2010

Lasting 3

One question I get asked a lot is this,

"Are your shoes Goodyear welted?"

Well, here's the thing. The Goodyear welt is an industrial process which was developed to replicate the hand welted shoe, which is what we do. So the answer is no, they are not Goodyear welted, they are hand welted. And there usually follows a long explanation of the differences, which I can boil down to ' our way is better, stronger and more durable'.

Esentially, the way we make shoes dates from the 16th Century. And when the Industrial Revolution came along, they invented machines which do the jobs a skilled artisan like me has taken years to perfect. So the shoes they make in Northampton for example, have a similar construction as our exquisite bespoke shoes (nominally), but there is a world of difference between the two.

Firstly the materials we use are of the utmost quality. The best box calf for the uppers and the best oak bark tanned cow hide for the soles, heels etc. This has the effect of lengthening the life of the bespoke shoes. We say 15 to 20 years if you polish regularly, but it can be longer (just look at some of the royal shoes!).

Secondly, a hand welted bespoke shoe is made with a integral feather or holdfast (cut out of the insole), rather than being made from components. This imparts enormous strength and durability.

Thirdly, bespoke shoes are hand lasted (see below) which gives a near perfect result and which also makes the two shoes a matching pair. Factory shoes lasted on a machine are simply not as reliable. Some may be perfect, but many are not. Just take a look at some of your shoes.

And if any of you can think of other reasons, then please feel free to comment.

Now, lasting. We left you last week with the toe puff lasted right on and dry. The next task is to shape it. The trick is to shape it to the lasts' toe shape. Use a rasp. Concentrate on the feather edge. Also make sure you don't rasp right through the leather. The thickest part of the toe puff should be the top of the toe box and it should thin out towards the straight edge.  The toe puff keeps the toe in shape when you take the last out, so it must be strong. This process gets easier and you have to have an idea of how thinly you skived the toe puffs before you lasted them. Also concentrate on the straight edge. This must go down to nothing so that when you last over the upper, you don't see the toe puff. Use a fine rasp to finish this edge, but be careful not to damage the lining.


When you are happy with the shape of the toe puff and you have made the other one the same (a pair of shoes remember), turn the shoe over. You will see that the toe puff is very thick and full of nails. Carefully take the nails out. You now have to skive the excess leather and make a flat feather edge.


When you have cut the excess off, use your rasp to finish the job, but make sure you rasp towards the middle of the shoe because if you rasp the other way, you will pull the lining away from the last as there are no nails holding it in place.

You are now ready to last over the upper. Put paste on the toe puff and all along the feather edge underneath.


With your lasting pliers, pull the front of the upper to the last and put in a nail. If you have a toe cap or vamp measure, make sure you have pulled it to the correct point.


Continue to put in nails. 1 on one side, then 2 on the other, then 2 and 2 on each side. Make sure there is a little pleat of leather between each nail.


Continue with the nails all the way to the waist and meet up with your nails there. When you are lasting, each time you pull and put in a nail, turn the shoe over and check your upper. It must be in the right place. If you pull too hard you will pull the upper out of alignment. If you don't pull hard enough, the upper will not sit flat on the last. This is one of the amazing things about leather, it's ability to take the shape you want it to, to transform from a flat material to a 3D shape. A bit miraculous really. Just keep checking. You need to get the vamp to sit tight to the last.


When you have your nails in place, you can trim the excess leather off, which can make the next stage a little easier.
You need to go back to the toe now and pull and put nails into the pleats between the nails. You are aiming for a completely flat feather edge. You can help with this by using the flat end of the French shape hammer and tapping gently.


Trim off the excess leather to about 6mm from the nails. And take out the nails from the lining.


Finally hammer down all the nails and you have almost finished the job.


Check the toe and if there are any small irregularities, use a hammer to tap the toe puff. Be gentle.


And that, as they say, is a wrap.

Until next week, happy shoemaking.

Friday, December 10, 2010

Lasting 2

Another week, another welt. Our event last Saturday at Wolf and Badger was fun. Josh and the gang had done a special window display with a gift wrapped dino and our lovely Winkers. We displayed our new tweeds and had a small demonstration of our bespoke shoes. The event was helped on its way by mince pies and whiskey macs (mmm!). But the icing on the cake was the performances of the delightful Liberty Belles, two gorgeous retro hillbilly barmaids  pickin bluegrass and old time tunes to the passing shoppers. It became a bit of a knees up (or is that a ho down?). Excellent!
The prize draw (a pair of Winkers) was won by the delightful Hermione who had entered because she wanted to give some shoes to her dad for Christmas but had tired of pestering her mum for the money. Enterprising girl.


Now, back to lasting. I left you last week with the heel part up to the waist lasted down and trimmed (and looking neat and tidy I hope). This week we are going to look at the fore part. This involves putting on the toe puff and lasting over the upper.

The first thing to do is take out all the nails at the front and last over the lining. Peel the upper back to the facings and then start lasting. Pull at the centre on the toe and put in one nail. Not too tight.  Then put one nail in to the side, then 2 on the other side. Again, you have to pull and create a pleat of leather between each nail. Continue back to the waist.


Next you trim the lining close to the nails and bang them down. Before doing this you might like to try putting some paste between the insole and lining. This keeps the layers together when you are welting.
By the way, aim to put the nails into the centre of the holdfast/feather.


Now comes the toe puff. This should be mellow. This means soaked in water and about 80% dry, so that you can work it easily.
On the lining, on the top of the shoe, mark a point 2 1/2" from the feather edge. This is where the toe puff will end. If you make it too long, it will dig into the toes when the foot flexes. Put paste all over the lining in this part and place the toe puff on it with the straight edge on the line you have marked. Put 2 nails as shown in the  picture. This keeps the toe puff in place while you last it.


Now start lasting the toe puff, as you did with the lining, put one nail at the front and work bakwards along each side. Make sure you flatten out all the pleats, by putting more nails in as required. Go to the end of the toe puff. The object is to get it as flat as possible. You can use the French shape hammer to help with this. Tap gently.


Before you hammer down the nails, trim the toe puff close as shown in the picture. And make sure you take out the nails from the lining which are underneath the toe puff. Hammer down the nails.

At this point you have to let the toe puff dry. This takes a while so it seems an obvious place to take a break. Next week will be Lasting 3, where we take you to the end of the process. Gripping, eh?

So, until then, happy shoemaking!

PS we have just passed 30,000 hits on the blog which is amazing. So a massive thank you to all of you loyal readers


Friday, December 3, 2010

Lasting 1

Ooh, how exciting! Look at my new business card. Doesn't that look impressive?


Things are going very well at Gieves and Hawkes. The workshop looks great, I hope you will agree.

We have been very busy bedding in there, meeting all the staff, setting up our systems and procedures. And taking all the new orders of course!


We are doing a trunk show tomorrow at 
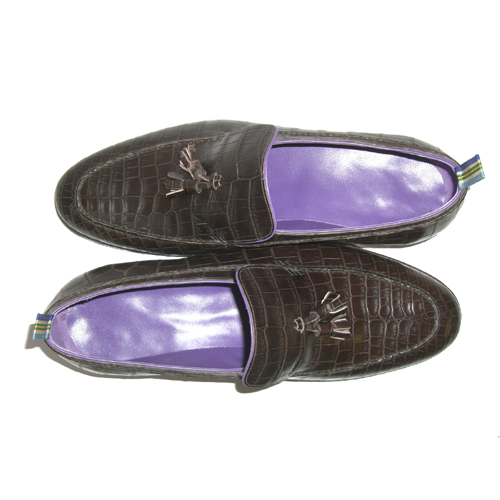
Wolf and Badger. This is at 46 Ledbury Road in Notting Hill, London, from 12 till 6, so if any of you are in the vicinity, then pop in, weather permitting. This is where we retail the Winkers Resort Shoes, but we are also showcasing the bespoke shoes there tomorrow. We also have some new stock of Winkers, particularly the new Harris Tweeds which are slightly heavier  than the Dashing Tweeds, but lovely in every way. Pop in for a mince pie and a whiskey if you are in the vicinity. We would love to see you.


This week I am going to look at an aspect of making bespoke shoes which is extremely important. It can make or break the final look of the shoe. Previously I stressed how important the finish is on a shoe, but this week it is going to be lasting, which happens right at the start. However, the results will be seen clear as day on the final shoe. If you get it wrong - if it's twisted; if it's uneven; or if they are not a pair - then the final shoe will look all wrong. So spend time on it!

You start with your stiffener and toe puff, all skived and glassed and ready to go. Plus side linings if you are going to use them.
Make sure your uppers are tightly laced and separate the lining from the upper at the back. You are ready to start. This shoe is somewhat unusual because it has a cork platform and the insole up in waist. This is because the client has one leg shorter than the other and needs arch support. But this does not affect the lasting.


On your glueing board, paste the skin side of the stiffener lightly and insert the stiffener between the lining and the upper, glue side out. Once in place, paste the flesh side, so that you have paste on both surfaces.


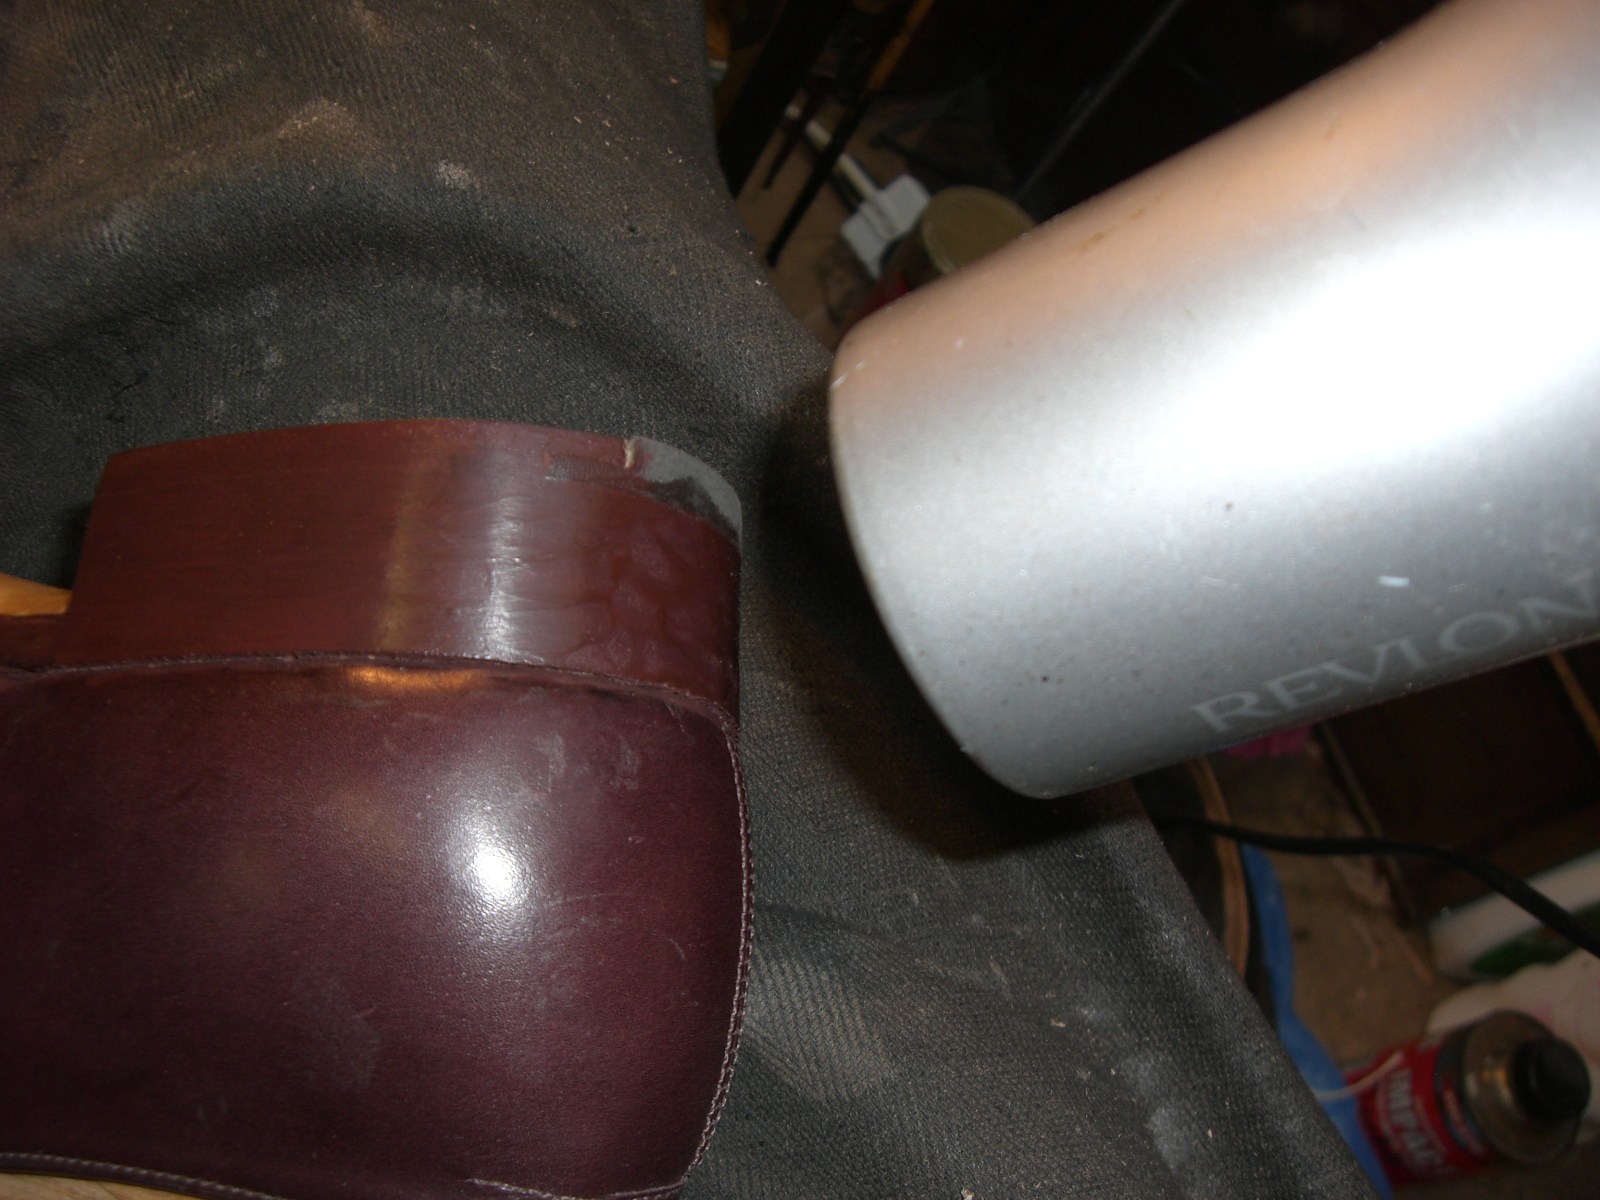
Now you are ready to begin lasting. Put some French chalk or talcum powder on the last. This helps to take the last out when you have  finished the shoes. Place the upper on the last. Push the upper up at the back so that it sticks over the top of the last by about  1cm.


You can put a nail into the lasting allowance at the bottom of the back seam. This stops the upper moving and keeps the back seam straight. However, you must be prepared to take it out if the upper is not sitting properly on the last at the front. This can cause the back seam to move one way or the other, but it is more important to have the front straight.

 Once the back is positioned, you can concentrate on the fore part. Pull the upper down at the front in the middle with your lasting pliers. If you have a cap measure or a vamp measure, you must pull until it is in the right place. Remember though that once you have the toe puff in place, the measure will increase by 2 or 3mm. Put one nail at the centre in the front. Put the nail in the centre of the holdfast/feather.
Once you have one nail in the centre at the front, you continue to last around the toe In general, when  you have pulled the upper to the right place, push the pliers down to hold the upper in place. With your other hand, grab a nail and push the point of the nail into the spot on the upper where your lasting pliers are holding the upper in place. Now you have to make a transfer of pressure from the pliers to the nail so that the upper doesn't slip. Once in place, bang the nail in with the foot of the pliers. If the upper slips and you lose the lasting pressure, you must start again.
At this stage, you just want to get the fore part of the shoe in place, so that you can last the heel part properly.  We put 5 nails in in total to hold the upper in place. The next one goes at the side roughly where a toe cap would be. Follow the same procedure as before. Don't pull it too tight as you will make the upper crooked. Make sure that you keep checking the other side of the upper to make sure that it is straight. This is the real art of lasting, making sure the upper is in the right place. And then making sure the other one is the same.


The front is right now, so you can concentrate on lasting the back. Take the nail out of the lasting allowance at the heel and with the pliers, pull the upper down to your back height which you have marked on the last. This is usually 2 and 3/8" (7cm I think but check it!). When it is in place, put a nail in the back seam between 2 stitches so that you don't break the thread.


At the bottom in the middle, pull gently and put in a nail. Now you must begin to work your way round the heel. Start on one side and put in one nail about 7mm from the first. Each time you do this, the action is this - pull the lining separately first, then the upper and then both together. Put the nail in. You have to pull the lining first to make sure you get rid of all the creases.


Try to make sure the back seam is vertical and centred.

Put two nails next on the other side. Don't pull really hard, but be firm. Each time you need to make little fold of leather between the nails. Continue like this till you get to your heel marks. At this point you must measure the height. Between 2" and 2 1/4" on the outside and between 2 1/4" and 2 1/2" on the inside. If this is correct, continue with the nails to just behind the joint. The nails go in the middle of the holdfast at this point, like at the front.


Now you must go back and last between the nails to get rid of the little creases so that you end up with a flat feather edge. You can use the French shape hammer to help achieve this.

Once this is done, trim off the excess lasting allowance and bang your nails flat. This gets them out of the way and tightens the upper on the last.

You must get this done before the glue dries.

I am going to break here and continue with the toe puff next week. So, until then, happy shoemaking!


Friday, November 26, 2010

carréducker 2

Well, here goes, I can officially reveal the location of our second workshop. We are extremely proud to announce that we have opened a concession at Gieves and Hawkes, Number 1 Savile Row, London. That has a good ring to it, doesn't it?

We have set up a fully functioning workshop there, and we will split our time between the there and Bloomsbury. We will see clients and make shoes in both places. Our space is on the ground floor in the shoe section and we are just about visible from the Vigo St entrance. Swing by and say hello if you are in the vicinity.

We are behind a glass partition so that customers in the shop can see us working. We provide a fantastic piece of theatre, and, more importantly, customers can see what we do. This really helps to demystify bespoke and explain what it is that people are buying into when they commission work. I think when people see what we actually do, the whole bespoke shoe process sells itself.

We have had a great response and have taken orders already and it is only our second week there.

We have always thought that bespoke tailoring and bespoke shoes go hand in hand as complementary crafts, and, as far as we know, this is the first time the two services have been available in the same place in London. So Gieves and Hawkes and carréducker, working side by side, now offer a head to toe service for its clients. It is very exciting and a great opportunity for us. Good times!

As you can imagine, life in the last few weeks has been a bit hectic, so making shoes has been slightly sidelined by the move, but, as of next week, normal service will be resumed.

We met Justin Fitzpatrick aka the Shoe Snob this week which was great. We chewed the fat (or is that the sole?) and put the world of shoes to rights. I really like his blog, you should check it out if you don't already know it. Lively opinions and I really like the Shoe of the Week slot.

This week, we also met Stephen Pulvirent of Men's Flair and Simply Refined. Again, we had a very good chat about the world of bespoke and men's style. A real pleasure.

So people, that, as they say, is that. Until next week, happy shoemaking!

Friday, November 19, 2010

Ink And Wax 2

If you were an ambitious bespoke shoe making company in London and you wanted to give yourself the best opportunity for success, where would you choose to have your workshop? Answers on a postcard please (go on have a guess).
Well, it just so happens that carréducker has opened a second workshop in London and it is in an absolutely fantastic location. It is all a bit hush hush at the moment, but, as they say, all will be revealed. As you can imagine, we are very excited! More of this soon ( I am busting to tell you!).

So, back to more important things, like your heel and sole edges. I was a bit of a chump last week. Someone had taken the memory card out of the camera last week and not put it back, so I do still have the pics to finish the essay. How was I supposed to know?

Right, you have applied the wax to the inked edges and melted it in with a hot iron, but it looks all blotchey and uneven. Here is what you do.

When I first learned, I was taught to use a face flannel, put it over my thumb tightly and just rub the hell out of it until it melted and went smooth. This method still applies and it is a perfectly good way to do it, but it makes you sweat, especially in the summer. So I broke the rules and introduced the only machine (the shame of it!) into my workshop. A hair dryer!


So with your trusty flannel in hand heat the heel edge with the hair dryer, until the wax starts to melt. Then rub the hell out of it as before. But this time, you need much less energy. A final light rub brings out the shine.


The sole edge is a bit different. Don't use the hair dryer as you may damage the upper. Just rub with the flannel until the wax melts. Make sure you rub the top of the welt too. And do a final light rub to bring out the shine.


Lovely shiny edges.


Notice the little line of wax on the sole. Try to make this even as it looks really great.


Nearly done. You now need to use the seat wheel around the seat. This is just cosmetic, but it also covers any poorly finished seat areas. The seat wheel is an iron that you need to heat on your burner, but not too hot. It has a lip which you rest on the seat and you must press both downwards and into the heel and it leaves a line of little marks which looks very decorative I think you will agree. You will have to pass the flannel over it to get rid of any marks left by the wheel.


The last thing is to use a single lipped iron on the heel edges. This is a regular edge iron that I have ground down on a grinding machine. But you can sometimes find original ones.
Place it on the burner until it is very hot. You then run it round the top edge and front edges of the heel. It leaves a line and gives a finishing touch. If the line is not very defined, repeat the process, but put a bit of melted wax on the edge first and work it along the edges. Et voila! Gorgeously finished bespoke shoes.


If you like, you can use the edge of your fudge wheel to make lines too. It looks pretty cool. The sky is the limit and use your imagination.


That is it. Have a good week and happy shoemaking.

PS, very much looking forward to meeting the Shoe Snob on Monday.