So what am i talking about? Well, it's the length of stiffeners used in different styles of shoes. More of that later.
We have been madly cleaning the studio in time for the Open Studios which start this evening at 6pm and go on till Sunday at 6pm. So much work! You would not believe how much dust accumulates in six months. Do not believe what Quentin Crisp said. Dust just piles up and gets progressively worse. At least in a busy bespoke shoe workshop.
Still the worst is over, so I can get on with some making today.
Now, back to those stiffeners. These are very important in a shoe. They keep the heel in shape and that shape keeps the shoe on the foot. If your heel lifts in a shoe it is very bad for the health of the foot. Your heel lifts and to compensate, your toes curl downwards to grip the sole and you end up with painful, misshapen feet. So make sure your stiffeners are strong.
In a lace-up shoe, the stiffeners should reach the counter point of the shoe, because the laces are what keep the shoe on the foot.
In a casual shoe, a slip-on, loafer etc, there are no fastenings and so the shoe itself must perform the holding function. This is why a casual must have long stiffeners which reach up to just behind the joint. This has the effect of keeping the sides of the shoe in shape. Without the long stiffeners, the sides will bellow out and cause heel lifting - not good!
So here is how to do it. The leather you need is a stiffener belly. You can use a toe puff belly too which is thinner and thus saves you a bit of skiving. I use toe puff leather and it works just fine. A stiffener should be strong but not too thick, as this makes the shoe heavy and inflexible.
So, cut the stiffener out roughly and soak it for about ten minutes.


You should measure the length you need from the upper. Remember, about half an inch behind the joint on both sides. You are now ready to skive the stiffener.

Then using your template, mark and cut the stiffeners out.


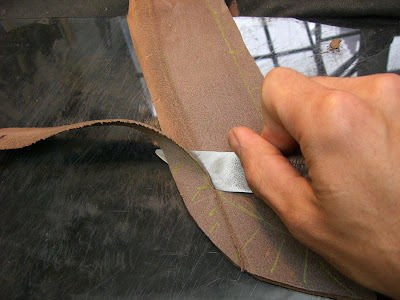
On the skin side, glass the surface off. This avoids cracking and squeaking in the future.

The edges of the stiffener should be skived down to nothing to avoid it being seen on the outside of the shoe.

I start at the two ends and then do the top edge, which should bevel from about three quarters an inch down to nothing.


Follow with the bottom edge. I do this a bit less as you only need to skive enough to last under the insole (about half inch).

Here you have all the edges skived.

Depending on the thickness of the leather, you should skive the rest at an equal thickness. Don't worry about lumps and bumps at the moment. When you have finished the general skiving, feel the leather and touch up uneven areas with your knife.


When it is generally clean and even, glass the surface to finish the process. The surface should be even and free of all lumps and bumps.


Your stiffeners are now ready to use. And remember you need two!

That is it for this week. Wish us luck for the Opens. Until next time, happy shoemaking.