We have eight students this time, from Australia, Canada, Holland, Germany, London, Singapore and Malaysia. They seem very nice and are getting on well. I will let you know more next week.
So, moving on to this week's subject. Following on from last week, I am going to give you details of our Making Packs. These are for those of you who want to make at home, but find it difficult to get all the tools, leather, uppers etc. Also for students who have done one of our courses and who want to carry on making.
The advantages of buying the packs like this are many. If you bought all the leather yourself, you would have to buy whole hides which are large and expensive. Some of them are enough to make 10 or more pairs of shoes.
You would have to have a last in the size you want to use.
You would have to make patterns.
And you would have to buy a whole upper skin, lining skin and close the uppers.
Making Pack 1
This is the complete pack which will allow you to make a pair of handsewn shoes as long as you have the tools to do it. All the rough stuff is English oak bark tanned cow hide, very good quality.
It includes:
A pair of standard lasts in a size of your choice.
A pair of calf uppers in a colour of your choice to fit the above last.
Insoles
Welts
Shank
Cork Filler
Soles
Split lifts
Heel Lifts
Heel Top-Pieces
Cost £400
Making Pack 2
This pack is for those who have bought Pack 1 and want to make another pair.
This pack has the same content as Pack 1 minus the lasts.
Cost £320
Tool Kit
This is a basic tool kit with the specialist tools and waxes you will need to make a pair of handsewn shoes. There are other tools you will need but these are generally available from hardware stores.
It contains the following tools:
Lasting pliers
A flat knife
Welting awl blade and handle
Stitching awl blade and handle
Shoemakers tape measure
Silver pen
Sleeking bone
French shape hammer
1 edge iron
1 heel iron
Bristles
Finishing wax
Hemp thread
Thread wax
Cost £300
NB if you live in the UK or the EU, we have to charge VAT on these prices.
This is quite an exciting development and should make your lives much easier. You will be able to concentrate on shoemaking rather than sourcing all the materials, which can be very time consuming and expensive.
Moving on, I had a request to explain how to keep the shoes clean and protected while you are making them. I could say be careful and don't get any glue on them. This is something you should try to do, however accidents happen and some leathers are more delicate and need protecting.
Traditionally we used cotton covers which were lasted over the uppers before welting. The problem with this is that cotton is absorbent and not particularly good as a protective layer.
Nowadays, we use plastic covers. You can buy specially made shoe covers which are used in the industry. These are very good and easy to use. You simply heat them with a hair dryer and stretch them on. They then shrink onto the shoe as they cool.
However, there is a simpler, more accessible solution. You can use food/freezer bags. And here's how you do it.
You start with a pair of shoes which you have lasted and are ready to welt.

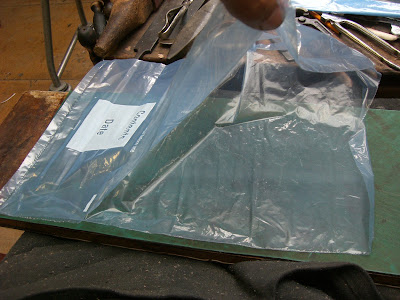
Take your food bag.

These bags have a seam where they have been heat sealed together. This seam splits very easily. So split it so that it is open on one side.

Put your shoe in the corner of the bag and turn it over.

You need to pull the bag tight.

You are then going to cut the bag with your knife giving yourself a margin of 2cm at least. Avoid hitting the nails when you cut the plastic. Cut around the toe to the joint. Then do the same around the heel.

This is how it will look when you have trimmed it.

Now you need to to put contact adhesive around the nails and the edge of the shoe. Try not to get it too near the edge because when you squash the bag down you don't want the glue to go on the upper. Be quick so the glue does not dry.

Quickly squash down the bag all at once. Hold ot all down for a minute or so and the bag will stick.

The area of the waist is a bit problematic. Use some sticky tape to pull it tight.

Then put a strip of tape around the feather edge. This gives a little extra protection and holds the cover in place.

You now have your covers on and are ready to welt as normal. Right at the end of the finishing process, when everything is completed, you gently cut the covers away with a knife, right in the welt so that you don't see the covers. It works! Your uppers will be clean and unblemished.

So there you are. Hope this helps.
Until next week, happy shoemaking.