Friday, August 27, 2010

The Seat

Greetings fellow shoemakers. I am feeling very chipper. This week we passed 20,000 hits on the blog and I am delighted. It means a lot to us that there are so many people out there who share our passion for bespoke shoes and handsewn shoemaking. So a great big thank you to those who read this. And again,if you have any thoughts, comments or requests, please just let us know and we will endeavour to respond.

I think our summer is over. We had a lovely June and July, but August has been a washout and today is cold, like Autumn, but never mind. It means the season of hard work is here and without the distractions of the hot weather, we can really sink our teeth into some new challenges.

Now, the title of this week's post is The Seat. That tricky part of the shoe where the heel meets the upper. When I cut it, it really marks for me the moment when the shoe starts to look like a proper shoe. It is a small job, but it makes a marked difference, and when done well, it looks great.
The trick is to get a thin and even seat, and here's how you do it.

Here you have the heel built and waist done, but as you can see, it is all messy and uneven. The heel is marked on both sides and this is the point I cut the seat.


First I mark the waist to the desired thickness, a quarter inch in this case. I do it by eye and then check it.


Now the seat. You need to mark a line from one heel point to the other. I use a tape measure and lay it on the seat all the way round. This gives you a level line. Hold the tape measure steady with all your fingers and draw a line with a pen.
Make sure the line meets up with the lines on the waist, so that the transition is smooth.


When you have the line, hold the shoe up and check that it is even all the way round. If it is not, make any adjustments you need to.


Starting at the waist, you need to cut along your lovely even line, all the way to the other waist mark. Open up the waist with your sleeking bone and wet the leather, including the seat. I place a piece of plastic behind the knife to protect the upper.


However, on the seat, you cannot protect the upper, so you have to be very careful and cut the seat along your pen line. Make sure it is even and straight.


At this point you have a wide edge on both the waist and the seat, which you will need to trim close to the upper.


Cut with the tip of your knife, so that the edge is just less than 1mm wide. You can use the plastic again to protect the upper.


On the seat, trim to about 1mm. Just make sure it is even all the way round. Use the plastic to protect the upper. For the thrill seekers amongst you who have a sharp knife, you can do this unprotected, but we do not advise this.


The seat is now completed. Peen it tight to the upper with the French shape hammer. Do the same on the waists. Cut the heel breast on the lines you have marked. You will notice at this point that the heel is out of shape again and you will need to reshape it to be in line with the new seat. Use your knife! All shaping should be done with the knife. Rasping is just to make the leather look smooth and free of blemishes.


Hope that helps.

And that, as they say, is that. For this week, at least.

So, until next week, happy shoemaking.

Friday, August 20, 2010

Sharpening Your Knife

Teaching the course gives you some perspective on the difficulty involved in making bespoke shoes. We can sometimes take our skills (acquired over many years) for granted, because we use them every day and there comes a point in any craft where a part of your subconscious takes over. People call it muscle memory. It is the point where you perform the task without having to concentrate as hard as when you are learning. Your mind has the space to think about other things, listen to the radio, chat, plan etc, and there is sometimes the zen-like state where hours pass, the work is done but you have very little awareness of it having happened. It can be rather wonderful.

But there is no short cut to this. You simply have to repeat and repeat until you get there. This is why the only ways to learn a craft properly are to be an apprentice or a very dedicated autodidact.

With this in mind, I want to cover some of the basics of making bespoke shoes.

The single most important (and difficult) skill you aspiring shoemakers need to master is how to sharpen your knives. This sounds basic and simple but it is not. I still have times when my knife just won't stay sharp or even get sharp. It is infuriating. It will also make the whole project very difficult - you make mistakes, cut the upper, cut yourself, skive badly, get sore hands, the list goes on.

We use a flat, steel paring knife. Some people use a flat one for making and a curved one for skiving, but I use the same flat on efor both. Other people use a steel knife with a wooden handle. Use whatever you are comfortable with. We also put a leather sheath on the knife to make it easier to handle.

To sharpen a knife, you will need a strop. This is a piece of wood with at least two flat sides, one for sharpening paper and one for a strip of leather. You can make a handle at one end if you like.


I use a special sharpening paper made by Norton which I buy from Marshall Coppin Ltd 020 8524 1018 (sorry no website). It is quite expensive but lasts much longer. You can also use aluminium oxide paper or sandpaper. You need to glue this to one surface using contact adhesive. It needs to be about 120 grit.


On the other surface, you need to glue a piece of upper leather or wax calf if you can get it. The flesh side needs to be facing upwards. Onto this you need to rub jewellers rouge which you can buy from jewellers suppliers. This is a very mild abrasive. Finally apply a little oil to lubricate everything.


You are ready to start sharpening your knife. The objective for your knife is to get a bevelled edge on one side of about 1cm.


The other side should be totally flat.


To achieve this, you must strop the two sides slightly differently. For the bevelled side, you must angle your knife very slightly up, about 5 degrees from flat. You then draw the knife back and forth on the strop. You must make sure the knife is kept even at this angle.


On the other side, you do the same action, back and forth on the sharpening paper, but this time with the knife completely flat. Keep going until the knife gets too hot to carry on.


It is hard to see the difference in these photos, and that is because the lifting on the knife is very subtle and slight, but you will see how the bevel develops on one side. If it doesn't, you are not doing it right.

So, with a razor-sharp knife in your hand, you are ready to perfect your shoemaking skills.

Until next week, then, happy shoemaking.

Wednesday, August 11, 2010

Finished! Party time at Wolf & Badger, Selfridges

We thought you might like to see the fruits of our students' work for the last fortnight - each one a labour of love...
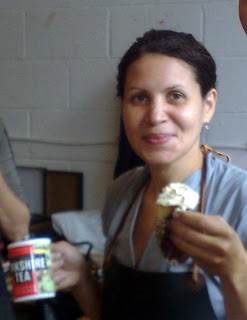
as you can see they couldn't contain themselves when the bubbly and cake came out to celebrate their achievements

Canan - glowing with pride as she models her comfortable, well-fitting shoes - "maybe the shoes I usually wear are too tight"?


Peter - is that relief, delight or sheer exhaustion? Probably all three as he was devastated when one of his shoes would not come out of the last. Why not? Well, they were a harsh reminder why it is important not to use too many nails doing the split lift at the heel. It took all 8 of us pulling and tugging, plus some risky action with a screwdriver to eventually get the last out. Once you get into a karma mode with shoemaking it will have a great effect on the old BP - calmer and karma = good shoes. Hope Claire was impressed on Tuesday night!
Nazim and Karin capturing the moment their shoes were unveiled. Very neat, accurate work Nazim. We're certain your family and customers back in Malaysia will be delighted when you start making for them! Karin enjoy your time with Marcel perfecting your craft...

Steffen your starter pack will be with you soon so you can get going on your next pair and impress all of your colleagues; Nathalie hope you keep shoemaking when work allows; Vijay good luck with your studies in Sheffield; Joorn stay passionate and particular...

I've been lecturing at LCF for the past few weeks as well, so it's been teach teach teach for me whilst jimmyshoe has been relaxing on his holidays...as they say, all work and no play etc. so this girl got to let her hair down this week at a party to launch the amazing new Wolf & Badger concession in Selfridges.

Boy do those guys know how to create a sleek, sexy retail environment ...and to party. Great set, great guests, just great....only sorry fashion products weren't included or our fabulous resort shoes - the Winkers - might have made it onto the shelves. But it was good to see them on so many party feet - Samir, Henry and George - thanks boys...and we will be launching our new H
arris Tweed versions next month in the Notting Hill boutique.

Now, off with the lippy and back to the knives and workbench...happy shoemaking until next week.

Friday, August 6, 2010

Red Hot; Tightening Tip; Final Week of the Summer Course


After a week of teaching, he is off on holiday for a well-earned rest, so I'm delighted to say, that it is my turn, The Other One, to deliver a post or two.

Above: These little beauties are our new studio favourites
. Much thought as always went into the design to distract the eye, narrow the profile and elongate the foot - now they've gone to have their bespoke shoetrees made and then they are off to their new home, only to be worn on special nights out we are assured.

The black calf and lizard uppers with the stitch detailing are enticing enough but...

to spice them up and give them the real WOW factor, they've got red-hot bottoms!


Looking at the pic below, "they've turned to shoe art" you may think, but you would be wrong!

This is a sneaky little way to help the uppers settle down onto a very concave last. Always keen to use materials around us, we use inner tubing stretched tight over the uppers to help bring the leather right down onto the last. If the upper doesn't sit tight onto the last then the customer ends up with more leather than they need. In this particular case, the fit is even more important as the customer has highly sensitive toes and if we leave too much leather it will create deep wrinkles which dig into the foot.


As you can see it took some doing but...


the end result is a tight fitting upper.

Now last week was also the final week of our handsewn shoemaking course. After a very physical first week lasting, skiving and welting the second week started with some intensive sole preparation and stitching.


The second week of the course is always less physically demanding but knife skills really need to sharpen up (excuse the pun) so that the upper doesn't get too beaten up. Shanks were made, cork cut, soles prepared, stitched and then heels built. Everyone was surprised at how long the finishing then takes - rasping and sanding the soles, heels and edges - but grateful for the way the wax, dye and polish disguised blemishes, stray stitches and those inevitable slips of the knife.
This is Joorn preparing his sole edges.

Below you can see just how hard everyone was concentrating - only our Ossie Karin student could still see the sunny side...

Nazim, Joorn, Vijay, Steffen, Canan, Nathalie and Karin excited to see their shoes finally taking shape...only Peter is missing - off on a chocolate run no doubt!

Well done guys - great work and an impressive finish. James and I remained unscathed until the very last - popping a bottle of bubbly to christen the new shoes I managed to gouge a chunk of bottle into my hand. Will anyone believe it wasn't my knife?