Welcome back fellow shoemakers of the world. Another exciting week in shoeland.
We saw one of our old interns and fellow shoe freaks this week who brought a friend of hers to talk to us about a project he has to make high end sneakers. All very exciting and lovely to see her again. It is a great feeling when people start asking you for advice. Who me? you think at first, and then you think well, why not me? We both have a lot of experience in this game now. Who would have thought, eh?
Things are afoot at Gieves and Hawkes. The boards on the gallery in the Map Room have come off and previously covered up windows are letting light flood in again. The space is going to look amazing when it is finished. Roll on April and the big launch. Very exciting!
The Other One was very much the film star this week. She spent a whole day being primped and preened for the camera. More on that when the film is released, but until then it is a bit hush hush. They didn't want me in it for some reason. A face for radio is how they politely put it.
Now, back to bespoke shoes.
I would say about 95% of the shoes we make are for men, so when a lady orders shoes from us I am a little concerned. The reason is that, while I know how to make ladies shoes, I do not do it with any frequency, so I am not grooved in the techniques at all. This means that every stage is a struggle and I have to concentrate really hard to get it right.
It's funny because with bespoke shoemaking, as with any highly skilled craft, the more you do it, the less you have to think about it. It's as if your hands and subconscious brain do the work while your conscious mind is free to think; listen to the radio; chat with colleagues; or simply zone out. It can be quite meditative. Hours can pass without you noticing - I love that zone.
People call it muscle memory, which is only partly true because your brain is still heavily involved, just not a bit of it you are conscious of.
Do any of you get into this state while making handsewn shoes?
I am getting a book title here - Zen And The Art Shoemaking.
I know, it's been done before. Really showing my age there.
Anyway, ladies shoes. I recently made a pair with a 2 1/4" stacked leather heel. This is a specialist technique which is broadly similar to building a man's heel, but with a few extra complications to bear in mind.
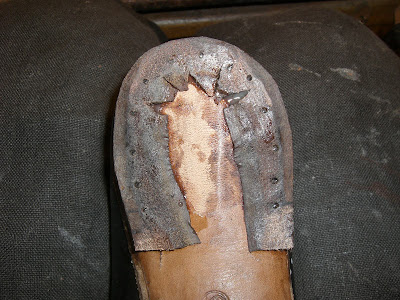
Having stitched the sole, you are ready to build the heels. Start with the split lift or rand as normal. Paste and nail it into place. Make sure you glass or rough the surface of the sole at the heel first.
With your knife you can start the flattening process by skiving the split lift/rand flat.
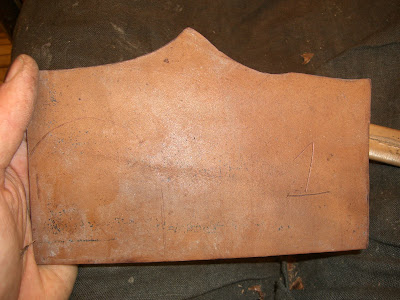
You will need to make sure you have enough lifting leather in a mellow state (fully soaked in water and about 80% dry) to build the heels. Draw round the left heel first. To make life easier and the heels the same height, mark that bit of leather with a 1 so that when you come to build the right heel, you know which piece of leather to use first. This way the same thickness of leather is at the same point on each heel.
Put some paste on the heel, place the lift on and put 3 nails in the centre in a triangle shape. You can put a row of nails into each lift, but I do it every second lift. This has the advantage of making the heel lighter.
With the 3 nails in place, you should be able to see where the surface is not flat. With your knife, try to skive away the lumpy bits. Place the back edge of your knife flat on the lift to check its flatness.
Before you glue each lift in place, you must either glass the skin side or rough it with a killer toothbrush. I don't know what this tool is really called!
Draw round a second lift, cut it out and glue it on. This time you can put a row of nails through both lifts.
This is the bit that makes me nervous. With a man's heel, essentially it is straight up and down. You might pitch it under a little, but putting in nails is fairly easy.
The trick with the nails is that you want them to be as close to the edge as possible so that they hold the edges tight, but not so close so that when you are shaping the heel they are revealed.
So on a high ladies heel which has a steep pitch you have to be very expert at judging where the final pitch of the heel will be and not put your nails too near the edge. You need to have a clear idea of how the final heel will look.
So draw your line for the nails. I do this by holding the shoe at eye level with a pen on it and rotating the shoe wile keeping the pen still. It seems to work well.
You end up with a line like this. Mark the heel points and a line 1cm behind for the last nail.
Hammer in your nails. You must mirror the angle at which you are going to pitch the heels when you are shaping them. Punch the nails with a nail punch and do the skiving flat process as before.
At this stage it is a good idea to start the shaping process with your knife, so that the heel begins to take its final shape.
Continue building lifts; putting in nails; and skiving flat. The heel gets higher. As you reach your target height ( as dictated by the spring on your lasts), you must put the shoe on a flat surface and check how it is sitting. It must not rock. It must sit steady and flat. The flat of the heel must correspond with the flat of the sole unless your last has a deliberate twist on it (unlikely). The right height is when you can put your finger under the toe when the shoe is on a flat surface and it fits snugly.
Keep building and shaping as you go. And don't forget to include the height of your top piece in your calculations. With a ladies heel this is usually synthetic because the surface area is smaller so the forces of impact when you walk are more concentrated and so a synthetic top piece is more durable.
When you are happy, mark the heel breast and cut it.
Et voila! A heel. Finally, you finish shaping it and you are ready to do the finishing.
As an extra piece of information, if you are building a very high heel or one with a complex shape (with curves for example), I was taught that it is better to do it on a board. Build the heel upside down on your cutting board. Shape it, glue it and nail it as normal and when you are happy with it, take it apart and build it on your shoe. It takes longer but the results are flawless.
Finally, I reckon the highest stacked leather heel you can build is about 2.5". After that it becomes very heavy. If you want higher heels, you should use a covered wooden one - but that is a whole other technique!
Anyway, hope this is interesting and, until next week, happy shoemaking.


