Well, here we are with week one of our January 2012 shoemaking course coming to an end. I am told that they are doing very well and should be welting before too long. I am stepping in for a day today, so I will get to see them all in action.
We had a mention in a great piece in the Telegraph about the new look Gieves and Hawkes flagship store at Number 1 Savile Row.
Another in The National about women in traditionally male trades like tailoring and shoemaking.
And a post on The Tweed Pig blog dedicated to carréducker - fantastic!
Thick and fast is how I would describe it.
Now, recent posts about spade welts and fiddle waists led to some good comments and a few emailed questions, so I am going to clarify a few points.
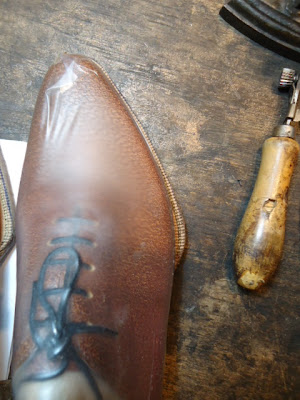
On a spade welt, it is important to alter your holdfast/feather at the joints and toe. You need to throw the lines out somewhat so that you can subsequently do the same with the welts. It is illustrated in the photos below. You have a normal holdfast and the lines show how you should alter them.
This mirrors the shape you will achieve on the spade welt itself.
Here is a welted shoe showing the width you need at the joint to get the right effect. On this pair, I left the toe normal in the end because it was not pointed enough to make the spade toe work well.
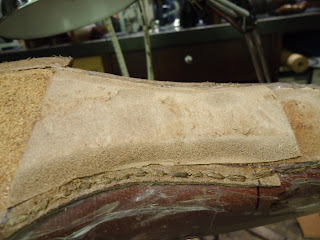
And so to fiddle waists. I said before that I used cork in a sample shoe, but shank leather on a customer's shoes. Well, here is an example of that. Same process, but with leather. This will make the shoe heavier, but it will last indefinitely, whereas cork could crumble away with time.
Same as before, you cut out and glue in the "lifts" and shape as you go.
Make sure the joint area is skived flat with the forepart. Otherwise your shoe will not walk right.
These last shots show how the welt looks when you cut it at the joint and the toe. Try to make them a pair remember.
And here is how the finished welt looks. This is quite an exaggerated one which is very visible when you are wearing them. It will also look better when the edges are inked and finished. I like that curve though.
And this is the leather built fiddle waist with the heel built. Looks just the same as the cork one.
Well, the day got away with me and I am posting this after the course has finished for the day, so here are a few pics. We spent the day thread making and welting which is always a challenge, but everyone is doing very well. More of the same tomorrow I think.
So, until next time, dear readers, happy shoemaking!


