Hand twisted hemp threads are either the delight or bane of a shoemaker's life depending on whether they are 'behaving' or not. How they behave is down to a great many factors - not least warm hands, technique pulling them through or the weather! The one thing we can help you with is how to make them.

We use twisted, waxed hemp because it is strong to stitch with and forms a 'plug' in the leather to make the construction more durable. (The wax is home made and you can find the recipe on the blog). We also nylon bristles.
Metal bristles are an option and boar bristles are the traditional choice but for us, they do not have the flexibility or strength that the nylon bristles does (or fishing line, which is what I used when I trained).
As a rule of thumb, welting threads are 5 cords of hemp x 3 arm widths and stitching threads are 3 cords of hemp x 3 arm widths. (An arm width is the distance between your hands, with your arms outstretched to either side).
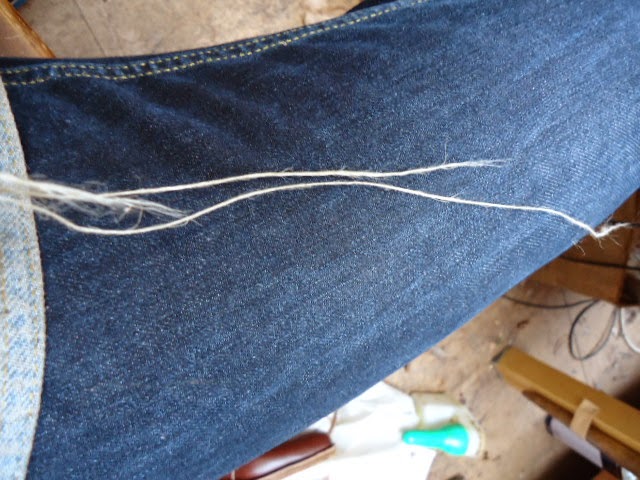
While sitting, stand the spool of thread on the floor between your legs holding the end of the thread in your hand. Initially start by just practising breaking the end of the thread to make a long, fine taper.

Roll the end of the thread on your leg so that the fibres untwist. Then pull it GENTLY and SLOWLY apart to make the taper. Keep practising until you are regularly making long fine tapered ends.
Once you have the knack make your threads as follows:
- Pull one cord of thread to make the required length (3 arm widths) and taper the end.
Stagger the taper of the next cord 4 - 5cm in front of the first taper. Run your hand back along
the two cords together to the other end. Check there are no lumps or knots. Now make a taper
at the other end.
- Repeat the process so that you have tapered ends, staggered 4-5cm apart at each end.
When you get to the last cord it needs to be staggered 11 - 12cm in front of the last taper (see
below).

Twisting the threads:
- Place the middle of the threads on a hook and stretch the two ends taught, holding them
where the tapers start. Using thread wax (a mix of rosin, beeswax and tallow), wax the full
length of the thread except for the tapers. Be generous.
- Keeping the lengths taut, place your foot on a chair or stool so that your leg is at a ninety
degree angle. Hold one end taut (in your mouth or hand) and roll the other end of the thread
on your leg, in one direction away from yourself to twist the cords into a single thread.
ROLL the thread to twist it
PINCH it so the thread does not unravel
PULL to untangle the ends.
Repeat.
- Keep rolling one half until the cords are twisted together all the way to the hook.
- Now, swap the threads in your hand and twist the other half of the thread (away from yourself
again), holding the first half taut in your mouth or hand so that it doesn’t untwist.
- Once both lengths are twisted all the way up to the hook, keeping them taut, rub the two
lengths of thread vigorously with a piece of leather along its length to the hook. (This melts the
wax and sets the twists in place (burnishing).
- Holding the thread taught, run the leather back down the threads to untangle any twists.
Twisting the ends:
- Take the thread off the hook and sit down. Very gently, twist and apply tar to the tapered
ends of the thread in sections starting at the thickest point and working towards the longest
taper. Towards the end, be extremely gentle so that you don’t break the tapers….dab the tar
on and then twist.
Attaching the bristles:
- Once the thread is entirely twisted you can attach the bristles.
- First, key three quarters of the surface of each nylon bristle with a piece of 240 sandpaper.
Then rub the roughened bristle with tar. Be generous.
- If you are right handed, pinch the very thinnest end of the thread over the bristle and make a
turn away from yourself between your thumb and forefinger, to attach the thread. Continue to
twist the thread onto the bristle away from yourself, making sure the coils are tight and close
together. Feed the thread through your other hand to apply some tension to the thread as you
are twisting it on. Attach the second bristle in the same way
- When you are approximately ¼ of the length of the bristle from the end, stop twisting and
make a hole in the thread with a nail and push the tip of the bristle through the hole. Pull the
whole bristle through the hole till it locks into place.
- Finally, skive off a tiny part of the tip of the bristle with your knife to create a slanting end and
pull the end of the bristle over your thumb nail to create a curve which matches the curve
on the awl you are going to use. Simple!
Until next week happy shoemaking and Happy Independence Day to our U.S. followers!
Until next week happy shoemaking and Happy Independence Day to our U.S. followers!