"I learned more in 2 weeks with you than I did in a year at LCF"
Praise indeed. It must also be said that while in America we discussed available shoemaking classes on the market and it seems that they are generally short, expensive and cemented.
Our ethos here at carreducker is to promote the craft of handsewn shoemaking which is why we do the course in the first place. And while we want to make a profit, we also try to make the courses as affordable as possible, so that the maximum number of people can do them.
If you think about it, £1650 for 96 hours in the classroom, plus £150 tool kit, the shoes you make, and top quality materials is a very reasonable price. Plus you are learning with genuine master craftsmen who have learned the craft the traditional way as apprentices.
What are you waiting for?
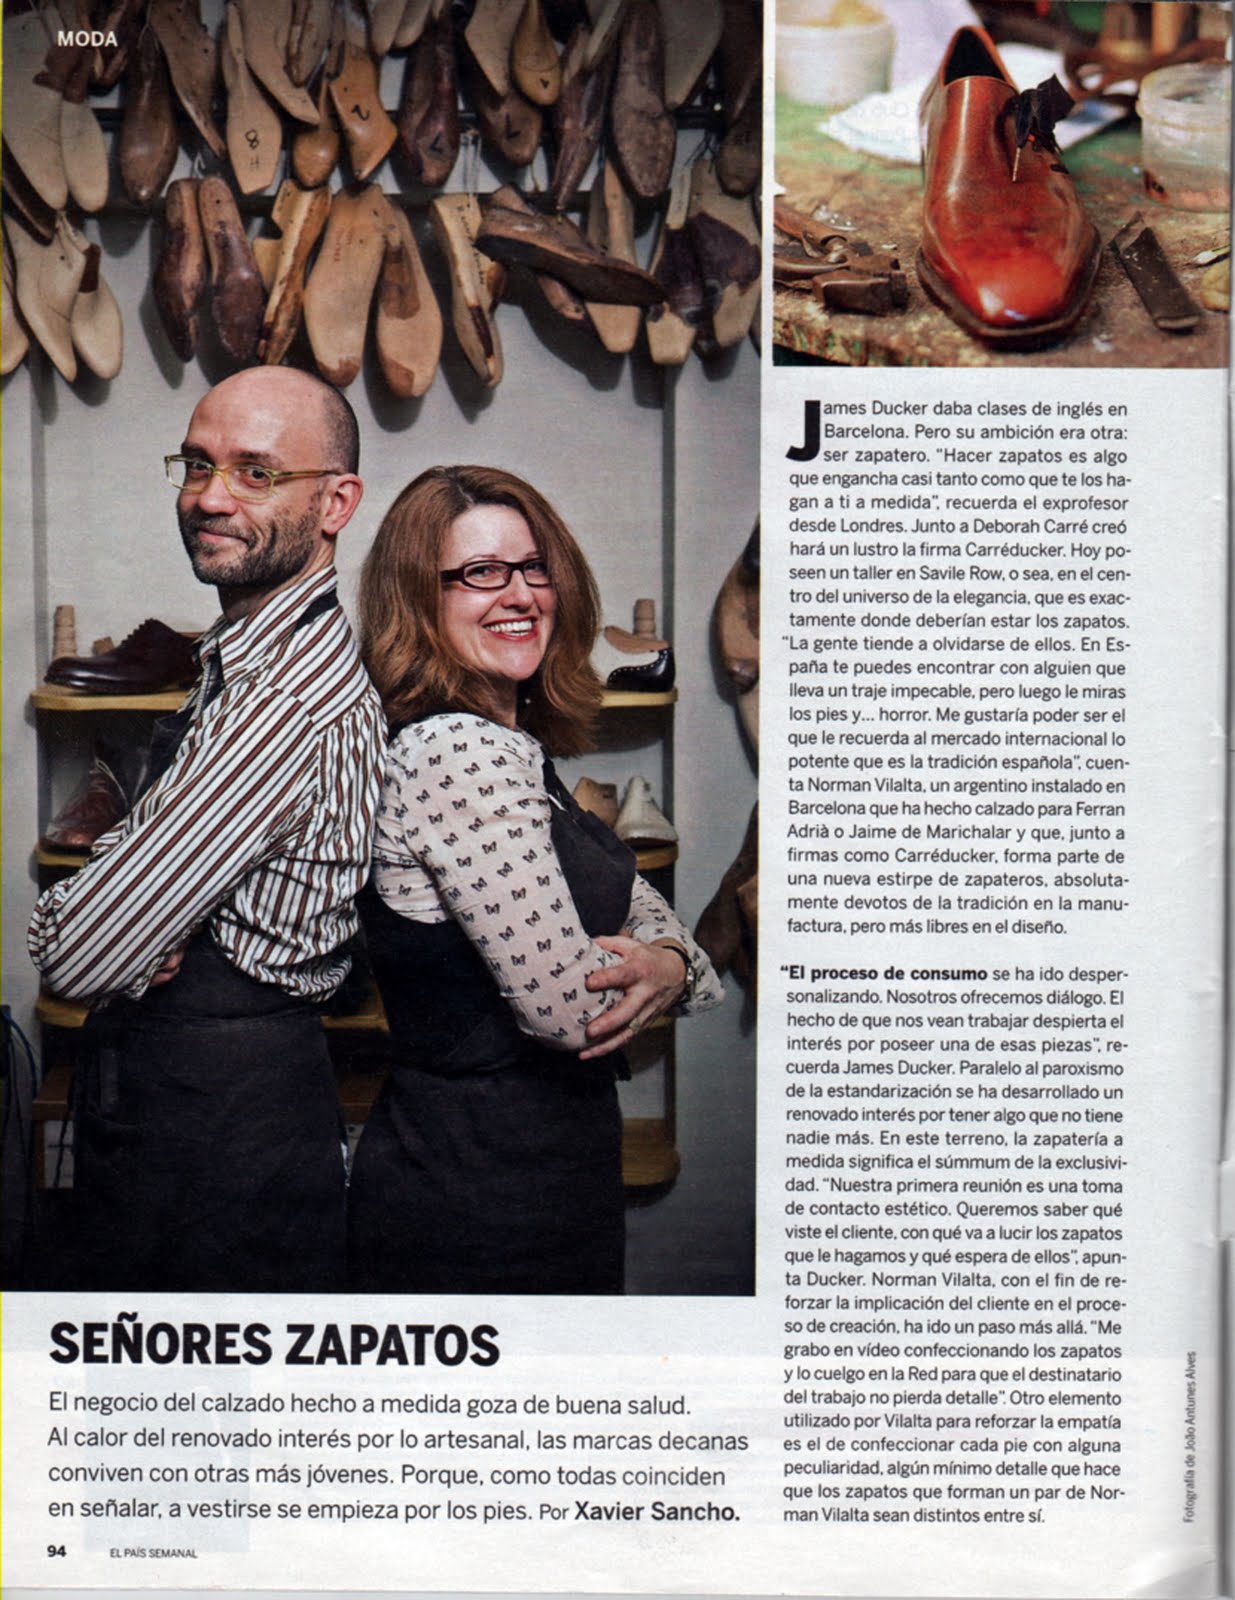
Nice bit of press for us. One for all you castellanoparlantes out there. Article in El Pais Semanal.


But back to all things shoemaking and bespoke shoes. Remember a few weeks ago I started a post about the story of a bespoke pair of shoes from start to finish and I had chosen a pair of velvet slippers? I had left them all lasted over, ready to put the sole on.
Remember also that this construction is unusual and not one I have done very often. So when I do do it, I find it a bit nerve wracking and I have to concentrate. I imagine it is how a lot of you feel when you are making shoes and it is good for me to remind myself of how it feels.
After the upper is lasted over, don't trim any excess off. Glue it down with contact cement and then brace stitch it on. This is where you use one thread and just stitch over the upper and through the insole. The result is in a pic below and I have done a post about it - the one about preparing for fittings/try-ons.
I also put on covers as they are velvet (see post archive)
Remember we had taken a paper outline of the sole? Well, put this on a piece of paper and draw round it. Mark your heel points. Give yourself lots of extra round the heel.

Next give yourself a 6mm margin around the line. This is to account for the insole and upper that is now on the last. You want to make sure the sole is too big rather than too small for the slippers.

Draw the sole outline on your chosen sole material. This should be thin and mellow so you can work it (soaked and 75% dry).

Cut it out and skive it to 1/8" by drawing a line around the edge with a pen. This is from heel point to heel point.

Skive it carefully making sure the skive is not too abrupt. Blend it in from a good inch from the edge. Glass it to get rid of perfections.
At this point it is a good idea to test the size on the slipper. It needs to look like the sole is too big for the shoe, like it will turn up slightly beyond the feather edge.

Draw a line 3/16" in from the edge. This is where you are going to stitch the sole on.

Wet the line with water.

Now here is the fun part. With a welting awl (it helps if you have a very curvy one, I keep one specially for this purpose), you have to make a series of holes on the line by going in and out with your awl. Let the awl do the work as the curve will bring it up again. And don't try to go too deep. This construction is for house shoes and dress pumps and is not supposed to be a rugged construction for walking up mountains in.
Take you time and practice on a bit of scrap first.
Make the holes close together.

It should look like this.

Glue both surfaces with contact cement and let it dry for 15 minutes. You only get one go with this glue so get it right when you put them together.
Hammer the sole gently to make sure it is well glued.
Hammer the edges hard to make them fold up against the upper.
This is how the brace stitch looks.

Nail around the heel as normal - nails half way in; clip them; and punch them. Pegs if you prefer.

Now the fun bit. Wherever you have a stitch hole on the sole, you need to make one into the upper. Do it as you stitch, one at a time.
On the first stitch put your thread into the first holes in the sole and the upper. You are ready to start.
Make your upper hole and reopen the sole hole.

Put your sole thread through the upper hole and pull it leaving a loop. Twist this forwards one turn. Then put the upper thread through the loop from the sole side towards the upper side.
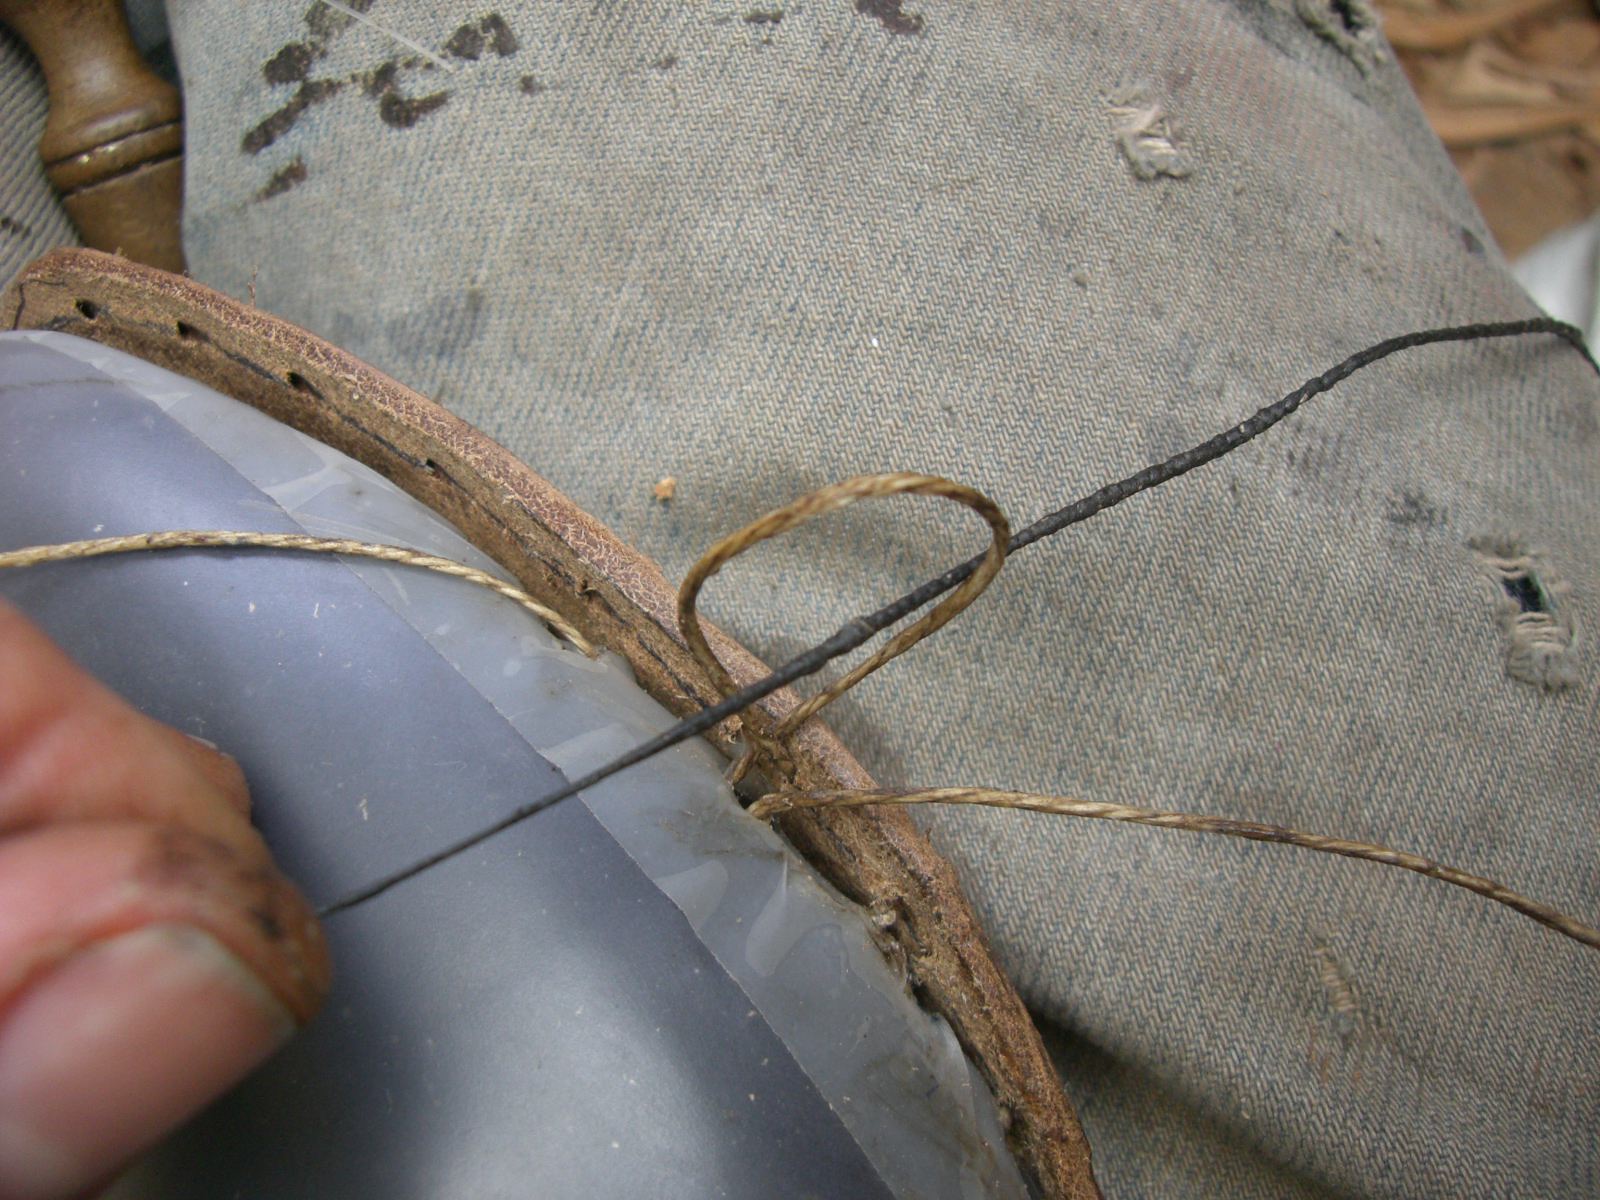
Then put it through the sole hole. Pull tight. It forms a little holding knot. Pull both threads tight and either with the handle of your awl or with a hammer, hammer the sole to flatten the stitches, all the time pulling the threads tight.

Keep going till you finish. Remember to hammer as you go.

When you have finished, skive the sole edge to 3/16".

Wet the edge and peen it in with the French shape hammer. Try to get it as tight as you can. Hammer out the marks with a flat hammer.

Then draw a line to 1/8" and cut it with your very sharp knife. You can use a thin piece of plastic under the leather to protect the upper.


This leaves an ugly edge. Yuck!

Trim it off with the tip of your knife.

And finally peen it right up against the upper as tightly as you can. It should look neat and straight and tight to the upper.

More pics of the finished sole next time. And I will build the heels and finish them.
I am going on holiday next week to Spain, so the Other One will be on blogging duties.
So until then, happy shoemaking