Friday, March 28, 2014
Crafted, Makers of the Exceptional
We are delighted to be showing at the Royal Academy as part of the Vicheron Constantin Walpole Crafted Makers of the Exceptional exhibition.
We would like to extend a warm invitation to you all to visit the Royal Academy, to come in to say hello and to see the work of so many talented craftsmen ...including old friends Ndidi Ekubia, Wayne Meeten, Ptolemy Mann, Mr. Smith, Jacqui Cullen and Helen Amy Murray.
Any talk of shoe making this week? Well yes. We are frantically busy making a new capsule collection for the show. (There will be pictures, but after the two of us spent a couple of hours wrestling lasts from a pair of riding boots, I'm afraid it won't be today!) The new showpieces are designed for a gentleman who enjoys country pursuits - a riding boot, jodhpur boot, stalking boot and Derby shoe - and we're really excited!!!
Anyway, the exhibition is free, so do please pass on the details.
The Royal Academy's Burlington Gardens entrance is also just across the way from Gieves & Hawkes at No.1 Savile Row, so it's an opportunity not to be missed to pop in to see the store's ongoing transformation. Below is our understated showcase in the new bespoke rooms which have a very masculine, elegant feel.
Much, much more news of shoe making next week, but until then happy shoe making!
Labels:
events,
Gieves and Hawkes
Friday, March 21, 2014
The Parachute Collective
If you found it difficult or expensive to get your hands on the right machinery, tools and equipment when you first started shoemaking then a new arrival in London's East End could be the answer.
The Parachute Collective under the railway arches in Bethnal Green, aims to provide aspiring shoemakers with access to machinery and know-how. The Collective was founded by Thomas Rowe, and, as well as being a studio space and showcase for the four young shoe designers based on its lower floor, it offers a number of work stations with a variety of closing and footwear making machines for hire on the upper floor.
As the website says;
"The Parachute Collective is a London based community of shoemakers and leather artisans. It is set out to support independent creative artisans and offers a retail platform for Cordwainers from around the world. The workshop is fully fitted to support all your shoe making needs and a retail area is available to members who wish to display their creative works".
Leathers
Space for clicking and pattern making
Machines
Displays 1
Displays 2
Shoemakers unite at the launch party
If you are interested in using this resource please email info@theparachutecollective.co.uk
Until next week, when we will be blogging from the Royal Academy, Crafted Makers of the Exceptional, happy shoemaking!
Friday, March 14, 2014
Fitting Up A Last To Make It Fit Better
Once again we welcome you, new readers and old, to the carréducker blog. With an important event for us coming up at the Royal Academy of Arts, we are madly trying to make our customers work and also complete a series of new sample shoes with a hunting, fishing and shooting theme. This means that both of us have been flat out at the bench stitching away and that other concerns have been put on the back burner for a while. It's great actually - we both still love shoemaking!
We have places left on our Pattern Making and Intensive Shoemaking courses in Brooklyn in May. Any of you interested? It's your chance to learn some of the key skills in shoemaking and help you develop your own pratice. And it's great fun too. So if you fancy one, two or three weeks learning to make shoes in buzzing Willamsburg, we would love to sign you up - email us at courses@carreducker.com
We have received a lot of requests recently for a post about fitting up lasts to make them fit better. We have covered this before, so what I am doing today is re-posting something from 2011 which gives a good idea of what to do.
I would point out that there is a "search" button at the top of the page which makes it fairly easy to find things on the blog. It's not foolproof but it works pretty well.
So here goes. Hope you enjoy it.
The client whose lasts these are is proving very hard to fit correctly. He has painful feet and oddly shaped ankles. The fore part is fine, just a few lumps and bumps to accommodate, but his heel going forward to the joint is proving to be a nightmare. Luckily he is very patient and wants to get this right, so does not mind coming in for fittings.
Here is the adjustment I made to his last after this week's fitting. We had tried various things to accommodate his painful heel, foam padding being the main one, but it hadn't worked, so we are trying a different approach.
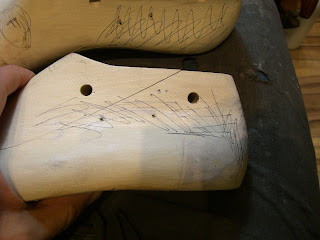
These are his lasts after the fitting. The pen marks are places where I have to take wood off the last, and the circle with the F is where I have to put a fitting. At the back, I want to off a whole lot to the line.
I like to mark work to be done on the last during he fitting. I take notes too, but I find the last easier to work with. The denser those pen marks, the more wood needs to come off.
One big problem was the fit along the top edge - way too loose and baggy, so I want to scoop away a lot of wood so that the shoe grips tighter.
A lot to take off on the heel.
Small fitting to put here.
Another very small fitting here.
Work starts across the joint on the top of the last. The sides of the lasts were fine, but there was a lot of excess leather across the top, so this is where it had to come off. If you leave too much leather on the top you get ugly creasing when the person walks and you also risk this creasing digging in to the foot and being painful.
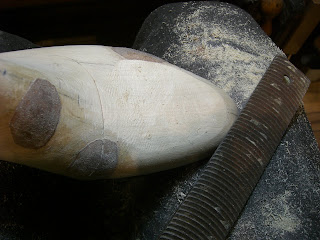
Next I started rasping off the sides. It is not an exact process for me and it is a lot of feel and look, so keep checking what you have done and look at the sawdust on the floor. Use a vice with soft jaws if you have one, but I tend to do it in my lap.
I use a tool like the one in the pics, but also use a surform and rasps.
Rasps, surforms and circular surforms.
I was trying to get a steep scoop on the last.
Then the other side.
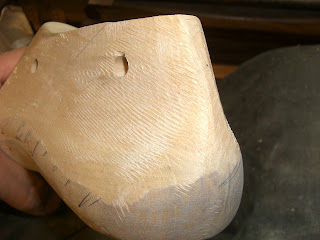
Now the back of the heel to that line I drew. Work hard!
Not a good shape here. It has to slant more so that his heel is gripped by the shoe so that it does not slip out of the shoe when he walks. This is very important. If your heel slips in your shoes, then your toes grip to keep your shoes on and it can lead to big problems with your toe joints.
Compare the two. You can see how much I have taken off.
Same process now with the other last.
See those lines made by the tools I use for taking off the wood. You need to sand them away to get a smooth surface on the last. This stops marks on the lining and pulling the lasts.
Fittings. I use toe puff belly generally because it is quite thick and you can put a big bit on and skive it off to your specifications. Cut it out; glass the skin side; skive the edges roughly; and glue it with neoprene/contact adhesive - strong glue anyway.
Let the glue dry for 5 minutes or so and glue it on
Skived edges.
I also use thick calf for thin fittings. This one is for the side of the last on the toes, so one edge is not skived.
Once it is glued on, you can start to shape it with your knife. Always try to make the transitions smooth so that you don't get massive lumps sticking out on the finished shoe. Generally, cut the fitting too big for the lump, so that you can blend it in to the last.
Nice blending, jimmyshoe! Sorry, I go a bit crazy writing this blog sometimes.
When I am done with fittings, I always cover them with a layer of the glue and let it dry for 12 hours. This way, the leather is not so rough; will not mark the lining; or stick when you pull the lasts.
The last little trick I used in this shoe was a cut out on the heel stiffener. This client has a sore lower heel, so cutting away the stiffener allows a bit of softness for this area. You can cut away like this wherever you have sensitive areas of the heel or toe, for that matter. I quite often shorten the toe puff to avoid sore toes.
And that, as they say is a wrap. Adjusting lasts is fun and requires a bit of intuition. It is hard to be precise about it, and the more you do it, the better you will get.
This took me about an hour and a half all in, but it was quite a lot work. Normally it does not take this long.
Well, dear readers, that is all for this week. I hope you enjoyed the post and I welcome any comments you may have.
Also, if you are a regular reader, I would really appreciate you becoming a Follower. Thanks
Until next time, happy shoemaking!
Friday, March 7, 2014
Robb Report, Mayfair Times and the Independent Shoemakers' Conference part II
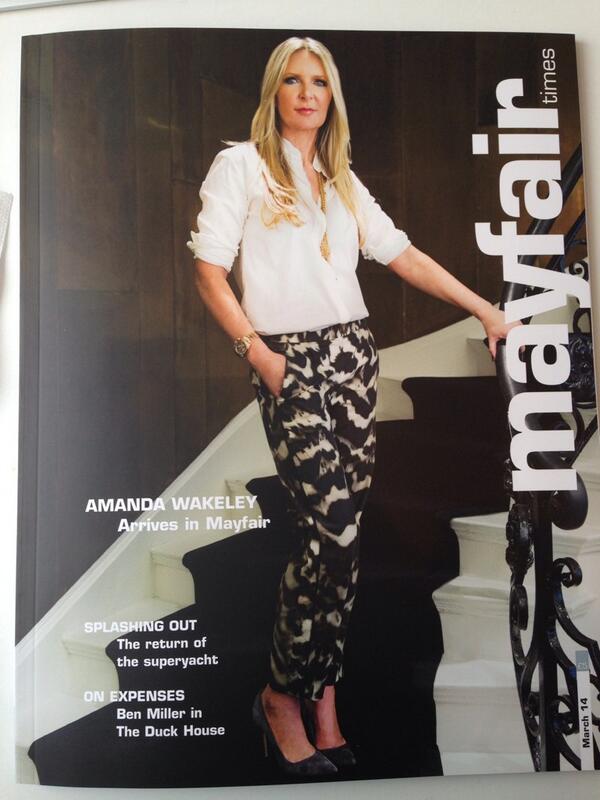
Today's lovely distraction was an interview with Mayfair's own glossy magazine, The Mayfair Times. (See the magazine's lovely new look below). Pictured above are Mr. Ducker (looking suitably sartorially superb) with the delightful Ms Lorna Davies of The Mayfair Times in the new Gieves' room at No.1. (We're very proud to be included alongside fellow Crafted alumni in a special Bespoke April issue of the magazine, but more of that next week).
Holding the paper perfectly still against the last with one hand, David then quickly folded the paper to mark the centre back and centre front. with a pencil he then marked the vamp point and back heel height and using his trained eye, drew in the top line and style lines.
Once he had the mean forme, David was able to use a trace wheel to transfer the styles lines and edges to create the necessary pattern pieces.
He also showed us how to make a standard and pattern pieces for a court shoe or pump...a style of shoe that has had me scratching my head in the past when I've been trying to work out why my pattern wasn't working. Anyway, his approach soon settled my doubts and I now feel confident enough to give my pattern making efforts another go.
The day closed with a fascinating talk by orthopedic shoemaker Martin Kistner, about the many different types of measuring equipment available for fee from foam impression boxes and carbon imprints to electronic footprints and 3-D scanners. Despite having tried many of these new tools, Martin still prefers to rely on the combination of his experience, a pencil and paper and a carbon imprint of the foot. I agree. Far better to grow your experience and to use the tools that work for you, than to keep trying new techniques and master none.
Martin's approach is 'Foot whispering'. He obviously has a keen understanding the structure of the foot and believes that many foot problems stem from an imbalance in the peroneal and medial muscles on either side of the foot. He feels the customer's feet and observes their posture and perambulation and then creates orthotics accordingly.
Sadly I don't have a picture, but the highlight for me was the photo Martin showed of his workshop...bliss! Organised, clean and with purpose-made furniture on wheels...I can but dream.
Until next week, with London bathed in sunshine, we wish you happy shoemaking!
Subscribe to:
Posts (Atom)